Home Blog Page 19

How to Become an Online Graphic Designer without Going to School

0

Have you always wanted to be a graphic designer but felt like going to school was the only way? The thought of spending years in a classroom and handing over a fortune in tuition fees is enough to send that dream packing.

And let’s be honest—learning complicated software like Photoshop or Illustrator on your own can feel like trying to tame a wild animal. If only there were a way to fast-track your graphic design skills without needing a degree or spending months struggling with design tools.

Here’s some good news: You can become an online graphic designer without going to school! And better yet, you don’t need to spend countless hours learning fancy software.

Ready to dive in? Let’s get started.

Why You Don’t Need a Degree to Be a Graphic Designer

Once upon a time, getting a formal education in graphic design was the golden ticket. If you wanted to work at a big design agency, impress your clients, or even just call yourself a “professional,” you needed that framed piece of paper.

Not anymore!

Thanks to digital innovation, businesses now care more about your skillset and portfolio than where (or if) you went to school. If you have the ability to design visually appealing graphics that help companies stand out online, then congratulations—you’re already on your way to becoming a professional.

How to Become an Online Graphic Designer Without Going to School

You don’t need to spend years studying, but you do need a game plan. Here’s the basic roadmap to becoming a professional online graphic designer—all without stepping foot in a classroom.

Step 1: Get the Right Graphic Design Software

Before you can start designing, you need the right tools. But don’t worry—you don’t need to fork over hundreds of dollars for expensive software.

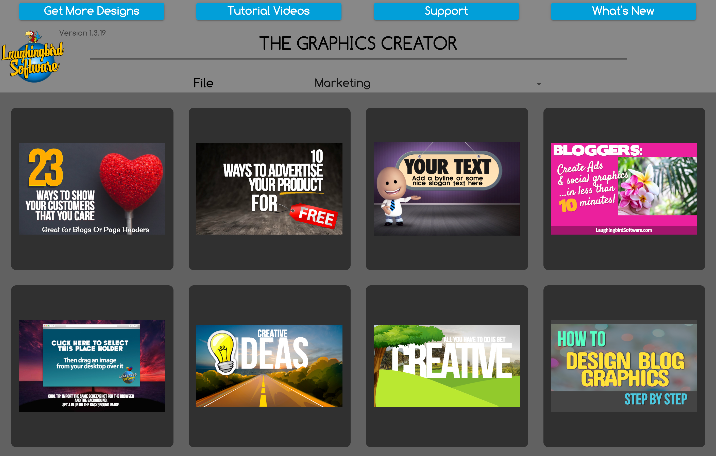
Start with an easy-to-use graphic design program that’s beginner-friendly but powerful enough to let your creativity shine.

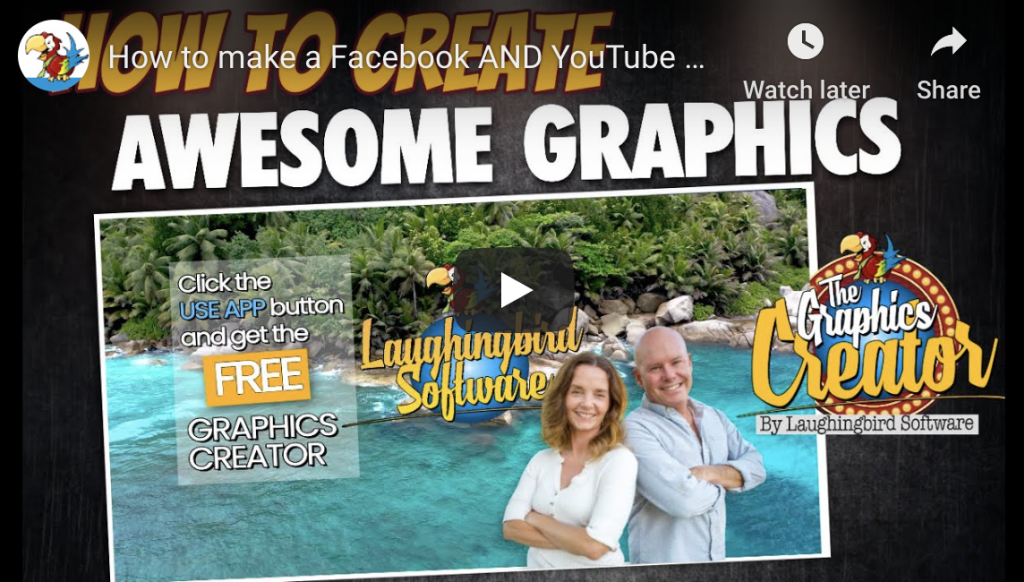
Grab your free Graphics Creator software here:

Download for Windows
Download for Mac

Download, install, and you’re good to go!

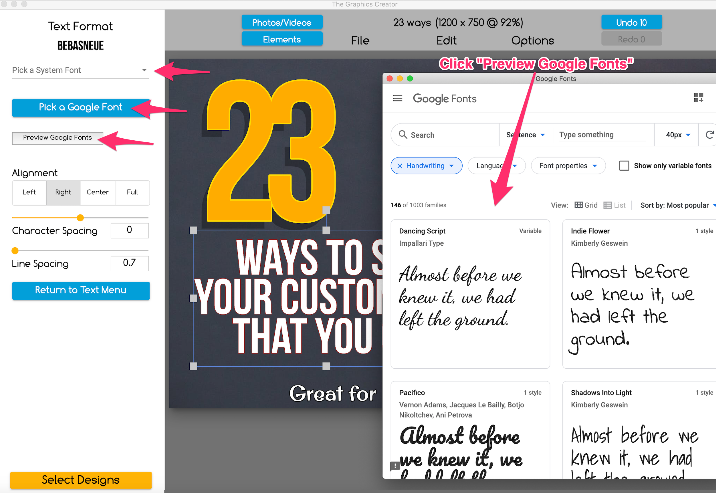
Step 2: Follow a Simple Graphic Design Tutorial

Now that your software is ready, the next step is to actually learn how to use it. But don’t worry—we’re not talking about endless textbooks or mind-numbing theory. Nope, just quick, hands-on lessons that teach you what you actually need to know.

Check out this free 9-part tutorial series (takes less than an hour!) to master the basics:

START HERE!

Learn how to be a graphic designer in less than one hour

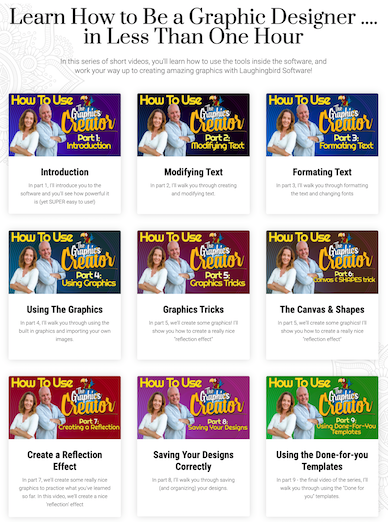
By the end of this mini-course, you’ll know how to create eye-catching designs that look like they were made by a pro. And you’ll barely break a sweat!

Step 3: Practice, Practice, Practice

You now have the right tools and knowledge—now it’s time to put it all into action.

Practice by creating sample designs:

  • Social media posts
  • Logos
  • Website banners
  • Business cards
  • Online ads

The more designs you create, the faster you’ll improve and the sooner you’ll be ready to take on real clients.

FAQs About Becoming an Online Graphic Designer

Can I make money as an online graphic designer without a degree?

Absolutely! Many online business owners need graphics but don’t have the skills to create them. If you position yourself as a go-to designer, you can easily sell your designs as a service.

How do I get clients?

Start by showcasing your work on platforms like Fiverr, Upwork, or your own website. You can also offer free or discounted work to attract your first customers.

Do I always need expensive software like Adobe Photoshop?

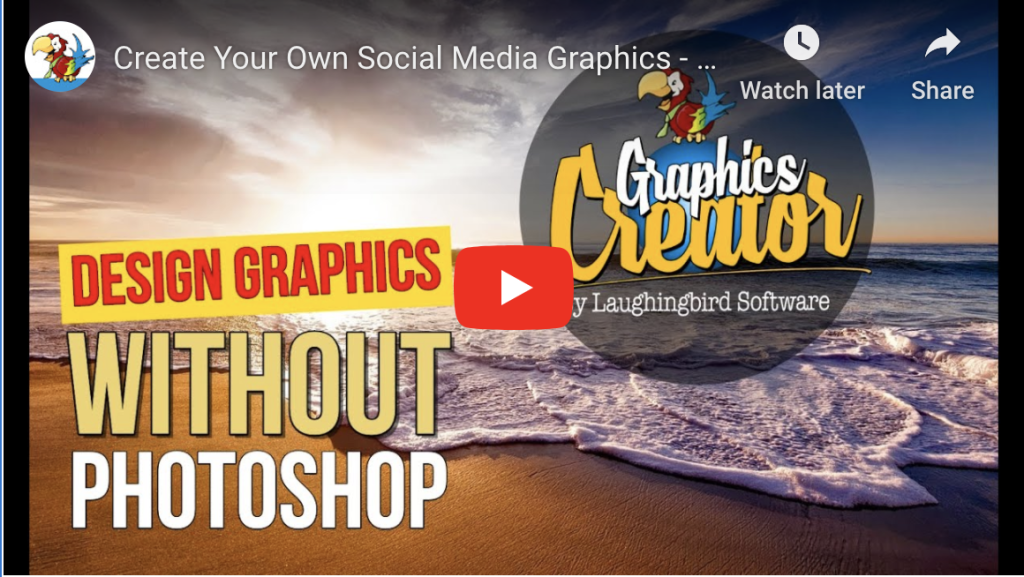
Not at all! Tools like Laughingbird Software’s Graphics Creator make it easy to design professional-quality graphics without the learning curve of traditional programs.

Your Future as an Online Graphic Designer

By now, you should be excited about the possibilities ahead. Whether you’re looking to do graphic design as a side gig or a full-time career, you now know it’s possible—without a degree.

So, what’s next?

  1. Download Laughingbird Software’s Graphics Creator.
  2. Watch the free tutorial series.
  3. Start designing and sharing your work.
  4. Keep learning and improving.

That’s it. No student loans required.

Now go out there and make something amazing. The design world is waiting for you!

7 Ways To Promote Your YouTube Channel

0

As an entrepreneur, you already know that creating YouTube videos is just half the battle. The other half? Getting people to actually watch them. And let’s be honest—spending hours editing, adding music, and ensuring perfect lighting just to get a handful of views is frustrating. But don’t throw in the towel just yet! YouTube is a goldmine for growing your business, building your brand, and yes, even making money.

The good news? You don’t need a massive budget, fancy equipment, or even expert-level marketing skills to boost your channel. All you need is a plan. And lucky for you, I have the perfect one—seven proven ways to promote your YouTube channel.

7 Ways To Promote Your YouTube Channel (Even If You’re a Beginner)

These strategies are simple, effective, and don’t require a degree in rocket science. Just start with the first one and knock them out one by one. Ready? Let’s dive in!

1. Write Click-Worthy Titles (Because Nobody Watches Boring Videos)

Ever browse YouTube and just scroll past a bunch of videos without even looking? That’s exactly what happens when your title is bland. If your video titles are as exciting as watching paint dry, no one will click.

So, how do you write titles that make people think, “I HAVE to watch this!”?

  • Use curiosity: “I Tried This TikTok Hack and You Won’t Believe What Happened!”
  • Make it benefit-driven: “How to Get 1,000 Subscribers FAST”
  • Keep it short (under 50 characters) so it doesn’t get cut off
  • Use numbers when possible—that’s why list-style videos like this one work wonders!

Before you publish, ask yourself: If you saw this title in search, would YOU click on it?

2. Master YouTube SEO (Because Google Loves Your Videos Too)

Fun fact: YouTube is the world’s second-largest search engine (after Google). And just like Google, it ranks videos based on what people are searching for.

This means if you optimize your content properly, people will find your video on their own—without you having to constantly promote it.

Here’s Your Must-Have YouTube SEO Checklist:

✅ Use Keywords in Your Title & Description

Think about what people might search for and use those exact words in your video title. Also, add them naturally in the first few lines of your description.

✅ Say Your Keywords in The Video

Sounds weird, right? But YouTube actually listens to your video (yep, AI is creepy like that) and uses this to understand what your content is about.

✅ Get More Engagement

YouTube ranks videos higher when people interact with them. So ask viewers to:

  • Like your video
  • Drop a comment
  • Subscribe
  • Share with a friend

✅ Add Video Tags & Categories

Tags help YouTube understand your topic and show your video to the right audience. Use as many relevant ones as possible.

3. Promote Your Videos on Facebook (Because Facebook Still Exists)

Facebook might not be as trendy as TikTok, but it’s still a powerhouse for getting eyes on your content.

How to Promote Your YouTube Videos on Facebook:

  • Upload short snippets of your YouTube video natively (Facebook favors native content over shared YouTube links)
  • Add a call-to-action like, “Watch the full video on YouTube! 🔗 (link below)”
  • Join Facebook Groups related to your niche and (strategically) share your videos
  • Make your cover photo match your YouTube branding for consistency

Need help creating a killer Facebook banner? Watch this video:

Make a YouTube banner from your Facebook banner in just minutes.

4. Cross-Promote Your Videos (Because People Need Reminders)

Let’s be real: most viewers watch one video, then leave. But what if you could lead them to another video before they escape?

Here’s how:

  • Reference an older video in your new one and tell viewers to check it out
  • Use YouTube’s “cards” to link to another video mid-watch
  • Add an end screen with clickable thumbnails to your other videos

The more content people watch from you, the more YouTube recommends your stuff. And that’s a win!

5. Embed Your Videos on Your Blog or Website

If you have a blog or website (or even if you don’t and just want to look fancy), embedding your YouTube videos can bring in new viewers.

Why this works:

  • People already visiting your site get a chance to watch your videos
  • Increases watch time, which is a BIG metric for ranking
  • Makes your website more engaging (because let’s be honest, no one likes reading giant walls of text)

Just take the embed code from your YouTube video and add it to your blog posts. Easy-peasy.

6. Create Eye-Catching Thumbnails (Because People Judge Books… and Videos… By Their Covers)

You could have the greatest video on the planet, but if your thumbnail looks like it was made in Microsoft Paint… well, good luck getting clicks.

Thumbnail Tips:

  • Make sure it’s 1280×720 pixels
  • Use bold, easy-to-read text
  • Keep it under 2MB
  • Use a 16:9 aspect ratio
  • Make it pop—bright colors and high contrast work best

Need a tool to create stunning thumbnails? Check out The YouTube Channel Art Creator.

7. Engage With Your Community (Because YouTube Rewards Interaction)

YouTube’s algorithm loves engagement. The more interactions your video gets, the more YouTube promotes it.

Easy Ways to Boost Engagement:

  • Reply to every comment (yes, even the weird ones)
  • Pin a comment with a question to stir up conversation
  • Ask viewers to “Subscribe and hit the bell” (yes, it actually works!)

FAQs About Promoting Your YouTube Channel

How often should I upload videos?

At least once a week if possible. Consistency is key, but make sure quality doesn’t suffer.

Is YouTube promotion free?

Yes! Unless you want to run ads, which can help accelerate growth. But these seven tips are completely free.

How long does it take to grow a channel?

It varies, but most successful YouTubers see real momentum after a few months of consistent effort.

Final Thoughts

If you’ve ever thought, “Why isn’t my YouTube channel growing?”—this guide is your answer. These seven strategies work best when combined, so don’t just do one and call it a day. The more effort you put in, the faster you’ll see results.

Now go apply these tips, and who knows? You might just become the next big thing on YouTube!

How to Make Cartoon Characters for Advertising Your Business

0

Cartoon characters can be a game-changer when it comes to advertising your business. Need to grab attention? Want to make your brand more memorable? A fun, quirky character can do that and more! After all, who doesn’t love a bit of entertainment while scrolling through websites and social media?

But beyond just looking cute, cartoon mascots can create deep customer loyalty by giving your business a personality. Think of them as your brand’s little storyteller, forging a connection with your audience in ways that boring, corporate branding never could.

In this guide, we’ll explore how to make cartoon characters for advertising your business, even if you have zero artistic talent! We’ll cover why these characters are so effective, how you can create your own without hiring an expensive designer, and the best ways to use them to market your business successfully.

Why Your Business Needs a Cartoon Mascot

Let’s take a trip down memory lane. Remember Saturday morning cartoons? (Or if you were fancy, after-school animated shows.) There’s a reason those characters stuck with you—nostalgia, humor, and branding genius.

Big companies have known this secret for ages. Think Tony the Tiger, the Geico Gecko, and even Mickey Mouse himself. These characters make brands unforgettable. They create an emotional connection that keeps customers coming back.

  • Characters are engaging: People love seeing faces, even animated ones. They make advertising feel more fun and approachable.
  • Your brand becomes more human: A mascot lets you express personality, humor, and emotion in a way words alone never could.
  • Easier recognition: Logos are useful, but a lovable character? That’s something people remember.
  • Breaks through advertising noise: Today’s consumers are bombarded with marketing messages. A fun cartoon character makes them pause and pay attention.

Still skeptical? Imagine scrolling through an ad-heavy Facebook feed. What stands out more—a plain text promotion or an adorable, big-eyed character waving at you? Exactly.

How to Make Cartoon Characters for Advertising Your Business (Even If You’re Not an Artist)

Now, you might be thinking, “Sure, all this sounds great, but I can barely draw a stick figure.” No worries—you don’t need to be a professional illustrator to create an effective brand mascot. In fact, blindly sketching without a plan is probably the worst approach. Let’s do it the smart way.

Step 1: Define Your Brand Personality

Before randomly slapping together a character, take a step back and think about what your business represents.

  • Are you fun and playful? A silly, exaggerated character will work.
  • Are you reliable and professional? A polished, charismatic but well-groomed cartoon might serve you better.
  • What problems does your brand solve? Make sure your character reflects this.

Your character should be a reflection of your business’s personality. If you run a fitness brand, a buff little cartoon coach makes sense. If you’re in tech, a quirky, nerdy robot might be fitting!

Step 2: Choose Features That Stand Out

Ever noticed how all the best cartoon characters have distinct traits? Whether it’s a giant head, tiny body, or goofy grin—the goal is to be instantly recognizable.

  • Exaggerated features: Big eyes, funny hairstyles, over-the-top expressions.
  • A signature outfit: Think Santa Claus—red suit and all. Give your character something iconic.
  • A unique color scheme: Pick colors that align with your brand but make the character pop.

Step 3: Use a Digital Tool to Create It

Unless you happen to be a professional illustrator, drawing from scratch can feel impossible. Luckily, there are modern tools that let you build custom cartoon characters without needing an arts degree.

One of my favorite tools for this is The Character Creator. It lets you mix and match different facial features, outfits, and expressions to create a truly unique mascot. No sweat, no complicated software—just an easy way to bring your cartoon to life.

Once you design your character, you can tweak its outfit, create different poses, and make it fit multiple occasions. The best part? No two businesses will have the same mascot—so you stay original.

Where to Use Your Cartoon Character for Maximum Impact

Now that you have your character, don’t let it just sit there collecting virtual dust. Use it everywhere!

  1. Your Website: Add it to landing pages, pop-ups, or as a chatbot mascot to make customer interactions more engaging.
  2. Social Media: Use it in posts, memes, and video animations. People are more likely to interact with a personality than a company logo.
  3. Advertising Campaigns: Whether on Google Ads, Facebook, or print promotions—your mascot can add a playful element to grab attention.
  4. Merchandise: If your brand is lovable enough, why not slap it on t-shirts, mugs, or stickers?

Overall, the goal is consistency. Like a friendly neighborhood character, your mascot should be everywhere your brand is. Over time, people won’t just recognize your business—they’ll feel like they know it.

FAQs About Cartoon Characters in Advertising

Do I need a cartoon character, or is a logo enough?

Logos are great, but they don’t talk, smile, or connect with people in an emotional way. A character gives your brand a real personality that a plain logo just can’t.

Can I use stock cartoon characters instead of making my own?

You can… but so can 500 other businesses. So unless you want your competitor using the same stock cartoon as you, it’s best to create something unique!

Will a cartoon character work for a ‘serious’ business?

Absolutely! Even serious brands use mascots—just in a way that matches their tone. Think of the Geico Gecko—it’s for an insurance company, but it works because it adds warmth to a dry industry.

So, what are you waiting for? Give your business the personality it deserves, and watch the smiles (and sales) roll in!

Need a smart tool to help you get started? Check out Laughingbird Software for easy-to-use graphic design tools that make branding fun and effortless!

6 Graphic Design Basics for Small Businesses

0

You know you’re new to graphic design when you spend hours shifting elements around, only to realize your final image still looks… well, off. And if you’re a busy entrepreneur juggling design along with everything else in your business, it can feel downright overwhelming.

But here’s the good news: creating your own designs saves you a ton of cash and ensures you get exactly what you need, exactly when you need it—without waiting on a designer. Thanks to easy creation tools loaded with pre-designed templates, taking control of your brand’s visuals has never been simpler.

Blog Graphics Design in Six Easy Steps

0


You’ve probably heard that high-quality blog graphics make an article easier to read and massively increase social media shares.

But there’s just one problem… you’re NOT a graphic designer. You don’t have the time to learn complicated design techniques or a big budget to hire a professional.

The good news? You don’t need to! You can design your own blog graphics in minutes—with zero design skills required.

First, grab the FREE Graphics Creator software, and follow these simple steps.

Blog Graphics Design in Six Easy Steps

Designing blog graphics doesn’t have to be overwhelming. With the right tools and a simple process, you can create eye-catching graphics for your blog, Pinterest, and social media in just minutes.

How to make blog graphics with The Graphics Creator

Want to design graphics without hiring a designer? Follow these six fail-proof steps below, and you’ll have your own stunning blog graphics in no time.

Step 1: Choose a Blog Graphics Template

You don’t have to start from scratch! The free Graphics Creator software makes it easy to design your own blog graphics with ready-made templates.

Simply select the free template set from the pull-down menu and choose one that fits your blog’s vibe.

Create graphics for your blog with these free templates

Step 2: Resize Your Canvas to Match Your Blog Layout

Blog graphics come in all shapes and sizes—from featured images to Pinterest pins. Resizing your canvas ensures your graphic fits perfectly wherever you plan to use it.

Here’s how:

  • Click “Format Canvas” in The Graphics Creator.
  • Adjust the canvas size. For blog headers, use 1200 x 750 pixels.
  • If needed, change the background color to match your blog’s style.

How to change the canvas size on The Graphics Creator software

Step 3: Pick the Perfect Images

Images make or break your blog graphic. You need images that grab attention and clearly convey what your article is about.

Here’s what to tweak:

Objects

  • Click on an image within the template to highlight it.
  • Use the “Image Menu” to resize, recolor, or delete the object.
  • Don’t like an object? Swap it for something else from the Elements tab.

Background Images

  • Delete the current background if you want a fresh start.
  • Search for new images in the “Photos/Videos” tab.
  • Import your own branded photos to keep a consistent style.

Pro Tip: Use relevant images that match your article. Pinterest and search engines love clear, thematic images!

Step 4: Add Text That Pops

Now let’s add the final touch—your blog post’s title or main message.

Here’s how to customize your text:

  • Click on a text box to highlight it.
  • Double-click to edit and type in your message.
  • Want additional text? Click “Edit” > “New Text” and type away.

Your text should be clear, bold, and easily readable—even at a glance!

Step 5: Choose a Stylish Font

Fonts set the mood for your graphic. A sleek, modern font can make your blog look professional, while playful fonts add personality.

Here’s how to switch it up:

  • Click on “Text Format” to browse hundreds of fonts.
  • Highlight your text and choose a new font.
  • For a better selection, check out Google Fonts via “Preview Google Fonts.”

How to Pick a new font for your DIY blog graphic design in The Graphics Creator

Step 6: Download and Save Your Blog Graphic

Time to save your masterpiece!

Go to the “File” menu and select “Download Image.” You can save it as a JPEG (recommended for blogs) or PNG.

Once you do this a few times, you’ll be creating blog graphics in a fraction of the time—it’s seriously that easy!

Now That You’ve Designed Your First Blog Graphic…

Congrats! You just made a professional-looking blog graphic, and you didn’t even have to call in the design squad.

Want to take it up a notch? Check out these ready-made template packs:

Pinterest Pins With Motion Backgrounds

FAQs: Blog Graphics Design

Do I need any graphic design experience?

Nope! The Graphics Creator was built for bloggers and content creators with zero design skills.

Can I use my own images?

Absolutely! Just upload your own images directly into The Graphics Creator.

Will these graphics work on Pinterest?

Yes! In fact, Pinterest LOVES eye-catching blog graphics.

Get More DIY Design Inspiration

Want more tips to level up your blog designs? Check out Creatorpreneurs Academy for tutorials and ideas!

How To Create Your Own Billboard-like Design

0

Hi there, Creators! Ready to make something eye-catching, attention-grabbing, and just plain awesome? Today, we’re diving into How To Create Your Own Billboard-like Design—and trust me, you don’t need to be a professional designer to do it (though if you are, hats off to you!).

With The Graphics Creator, you can craft impressive billboard-style designs right from your favorite cozy couch spot… or your office chair if you’re feeling productive. Let’s get started!

Why Create a Billboard-Like Design?

Whether you’re looking to promote your business, make a bold statement, or just have a little fun designing, a billboard-style image can be your secret weapon. Here’s what you can do with it:

  • Boost social media engagement: Perfect for Facebook ads, Instagram posts, and even that lonely Twitter feed you neglected for five months.
  • Create eye-catching YouTube banners: Make sure your channel stands out in the sea of content.
  • Design catchy website graphics: Use these to promote offers, events, or just to make your website visitors go, “Wow, this looks legit.”
  • Print high-quality signage: Yes, you can actually use these designs for real billboards, posters, and marketing materials.

How To Create Your Own Billboard-like Design: Step-by-Step Guide

Let’s walk through the process, step by step, using The Graphics Creator. It’s beginner-friendly, and trust me—you’ll feel like a pro designer in no time.

Step 1: Choose the Right Canvas Size

A billboard design typically follows a rectangular landscape format. Here are some size recommendations:

  • Social Media Graphics: 1200×628 px (Facebook Ads), 1080×1080 px (Instagram)
  • YouTube Banner: 2560×1440 px
  • Printable Billboard: 14×48 feet (yep, billboards are big!)

Once inside The Graphics Creator, select a new design and choose your preferred dimensions.

Step 2: Select a Bold Background

Billboards need to be eye-catching, so forget about subtle gradients and muted colors. Go bold!

  • Choose a high-contrast background.
  • Use bright colors to grab attention.
  • Make sure your background doesn’t clash with your text.

Think about your message: Is it sleek and modern? Go with a clean, minimal design. Advertising a summer sale? Try a vibrant, tropical background.

Step 3: Add Your Message in Big, Bold Letters

A billboard only has a few seconds to capture attention. People zoom past them in cars, scroll past them online, or blink and miss them. So, your text needs to be:

  • Short and to the point (e.g., “SALE – 50% OFF!”)
  • Big and easy to read (no tiny, fancy cursive fonts, please)
  • Contrasting in color (white text on a dark background or vice versa)

Inside The Graphics Creator, pick from dozens of fonts—experiment with bold styles to ensure maximum readability.

Step 4: Add Eye-Grabbing Graphics or Icons

While text is king, visuals are the charming best friend that makes the king look even better. Add elements like:

  • Icons that reinforce your message (shopping cart for sales, airplane for travel deals)
  • High-quality images (a product photo or an exciting action shot)
  • Shapes and elements to frame your text and make it pop

The Graphics Creator comes loaded with drag-and-drop elements, so feel free to get creative.

Step 5: Save and Export Your Billboard Design

Once you’re happy with your masterpiece, it’s time to save it. Choose the appropriate file format:

  • PNG: For high-quality images with transparency.
  • JPG: Best for web and social media.
  • PDF: If you’re printing high-resolution designs.

Now, upload it to your website, post it on social media, or send it to a printing shop if you’re going BIG!

Why Choose The Graphics Creator for Billboard Designs?

Listen, I love Photoshop… but I also love not wanting to throw my computer out the window when simple tasks take hours to learn. That’s why Laughingbird Software’s Graphics Creator is such a lifesaver.

  • Super easy drag-and-drop functionality.
  • No complex tools or confusing layers.
  • Perfect for beginners AND advanced users.

(Plus, you get access to the Creatorpreneurs Academy, where you’ll learn everything about making stunning designs!)

FAQs

Can I use these designs for actual printed billboards?

Absolutely! Just make sure you export your design in a high-resolution format (like 300 DPI) to ensure it doesn’t look pixelated when printed.

Do I need design experience?

Nope! The Graphics Creator is perfect for beginners and seasoned designers alike. If you can click and drag, you can make stunning billboard graphics.

Can I make designs for social media too?

Yes! You can use The Graphics Creator for Facebook ads, Instagram posts, YouTube banners, and even website graphics.

So, ready to give it a go? Head over to The Graphics Creator and start designing like a pro—no complicated tools required! 😊

How to Create Animated Video Pins in 5 Easy Steps

0

You’ve probably heard that video pins on Pinterest are all the rage. And you’re here because you don’t want to miss the party, right? Pinterest absolutely loves video pins, pushing them up in search results and showering them with views. That means more clicks, more followers, and—most importantly—more sales for you.

Still skeptical? Just take a peek at Laughingbird Software’s video pins. Some of them rack up thousands of views almost immediately. It’s like Pinterest has a VIP section, and only video pins are allowed inside.

So why aren’t you using them yet?

Oh, I know. You’re part of the club that says, “I don’t even know how to make a video pin!” Or the infamous, “This sounds way too complicated for me.” And my personal favorite, “I got confused just reading about it!”

Well, today’s your lucky day. I’m giving you five super simple steps to create animated video pins that will get Pinterest’s algorithm dancing with joy. And the best part? Absolutely no technical headaches (phew!).

Step 1: Grab an Easy Pinterest Graphics Tool

Let’s keep this simple. You don’t need a PhD in Photoshop or spend hours watching tutorials that just confuse you further. What you do need is a tool that’s easy to use but powerful enough to create eye-catching, high-resolution pins.

Enter The Graphics Creator. This tool is perfect for making Pinterest pins weekly (or daily, if you’re feeling ambitious). Plus, it’s not just for Pinterest—you can design every graphic you need for your business. Even better news? If you grab the Pinterest Templates with Motion Graphics, you get The Graphics Creator software for free.

Once you have your hands on the software and templates, watch this quick video to see just how easy it is:

Step 2: Choose a Template & Motion Video Background

Now comes the fun part. You don’t have to write a script, hire actors, and direct your own Oscar-worthy film. Nope. Creating a video pin is way easier than that!

Start by picking a professionally-designed template from The Pinterest Templates with Motion Graphics. These templates are already set to Pinterest’s ideal pin size (600 x 900 pixels, with a 2:3 aspect ratio), so you don’t have to tinker with dimensions.

Want it even bigger? You can adjust the canvas size while keeping the same proportion.

Next, add a motion background to give your pin some life. Click the “Elements” button at the top of the canvas, drag in a motion background, and—voilĂ !—your pin is already looking way cooler than 90% of the static ones out there.

Changed your mind about the background? No problem. Just click it, hit “delete,” and choose a new one. Quick and painless!

Step 3: Add an Attention-Grabbing Title

Your video background looks fantastic, but hold on—without a strong title, people will just scroll on by. So let’s make sure your text pops!

Double-click the existing text in your template and type in your headline. Need inspiration? Check out this guide on how to write killer headlines that actually get people to click.

Pro tips:

  • Make sure your text is large enough to read (tiny, scrunched-up words are a no-go).
  • Use bold, clear fonts that stand out.
  • Keep it short and punchy—don’t try to squeeze in an entire essay.

Step 4: Save & Download as a Video File

Okay, deep breaths—this part sounds technical, but I promise it’s easy.

When your pin is ready, click “Download” in The Graphics Creator’s menu. By default, it saves your file as a “WebM” format, which works for some social platforms but not Pinterest.

How to Convert Your File to MP4

Pinterest only accepts MP4 videos, so you’ll need to convert your file. Don’t worry—it’s just one more step.

  • Click your video image on the canvas, then hit “Video Record.”
  • Name your file and choose a video length (I recommend 12-20 seconds).
  • Click “Record” and wait for it to export.
  • Use a free online converter to change the WebM file to MP4.

If you need extra guidance, jump to 04:24 in this video—it walks you through the process.

Step 5: Post Your Video Pin on Pinterest

This is where you finally set your video pin loose into the world!

Posting your video pin works just like a normal pin:

  • Click the “+” button on Pinterest.
  • Drag your saved MP4 video onto the upload area.
  • Write a keyword-rich title and description.
  • Add the URL you want people to visit when they click.

Want to make sure you’re doing it right? This step-by-step guide has got your back.

Frequently Asked Questions

How long should my Pinterest video pin be?

Stick to 12-20 seconds for an animated background. Just enough to grab attention, not enough to bore your audience.

Can I use any video for my background?

Yep! The Graphics Creator lets you upload your own videos if you want something unique.

What’s the best size for a Pinterest video pin?

600 x 900 pixels is the golden standard, but you can go taller (like 1:2.1 ratio) if you want.

Ready to Boost Your Pinterest Traffic?

That’s it—you’ve successfully created your first animated video pin! Even better, you now have a simple, repeatable process to crank out compelling video pins anytime you want.

If you’re ready to make even more eye-catching pins, grab the Pinterest Templates with Motion Backgrounds and get designing!

Create Your Own eBook Cover Today

0

Don’t Just Be an ENTREPRENEUR – Become a CREATORPRENEUR!

So, you’ve got a brilliant idea for an ebook, course, or digital product? Fantastic! But let’s be honest—if your cover looks like it was made in Microsoft Paint circa 1998, your sales will suffer. That’s where The Graphics Creator comes in. No need for Photoshop headaches or hiring a designer who charges more than your monthly coffee addiction. It’s time to level up and create your own ebook cover today!

And the best part? You don’t need a designer’s bone in your body to make it happen.

Why a Professional eBook Cover Matters (Yes, Even for You!)

We all know the saying, “Don’t judge a book by its cover.” Well, that’s cute, but in the online world, people judge EVERYTHING by its cover. If your ebook is wrapped in an uninspiring, blocky, text-heavy mess, they’ll pass faster than my grandma swiping left on a dating app.

Here’s why your cover needs to shine:

  • Instant credibility: A sleek, professional design makes you look like an expert.
  • More clicks, more sales: People are naturally drawn to attractive visuals.
  • Stand out in a crowded market: There are a million ebooks out there—yours needs to pop.
  • First impressions count: Your cover is the first thing potential buyers see. Make it count!

Now, I know what you’re thinking—“But I’m not a designer!” No problem, because The Graphics Creator makes it easy.

Create Your Own eBook Cover Today with The Graphics Creator

If you’ve ever struggled with Canva’s endless toolbars or Photoshop’s soul-sucking learning curve, I feel your pain. But this isn’t that. With The Graphics Creator, you can whip up a professional-looking ebook cover in no time.

Here’s how simple it is:

  • Select a stunning ebook cover template or start from scratch (if you’re feeling creative).
  • Add vibrant fonts, images, and effects with just a few clicks.
  • Map your design onto a 3D mockup (think sleek software boxes and magazine-style covers).
  • Export, use it, and watch the compliments roll in!

And just like that, you have an ebook cover worthy of a best-seller list. You don’t even need to bribe a designer with pizza.

No Photoshop? No Problem!

Imagine a world where you don’t have to spend days watching Photoshop tutorials on YouTube, only to end up more confused than before. That’s what you get with The Graphics Creator. It’s a simple, intuitive tool that lets you create designs without a PhD in graphic design.

You don’t need:

  • A Canva subscription
  • A high-powered computer
  • A fancy design degree
  • Endless patience for complicated tools

Just drag, drop, tweak, and boom—you’ve got yourself a cover that looks like a pro made it.

Create More Than Just eBook Covers

Your fantastic new cover doesn’t just sit there looking pretty—it works. Once you create your design, you can use it for:

  • Opt-in forms – Get people to sign up for your email list.
  • Product displays & ads – Showcase your book or course like a pro.
  • Mockups of products – Make your digital goods look REAL.
  • Social media promotions – Share eye-catching visuals to attract buyers.

The Graphics Creator is basically your new online business Swiss Army knife.

Where Can You Use Your New eCover? Everywhere!

Once you’ve created your masterpiece, it’s time to put it to work. Here are some places to showcase your ebook cover:

  • Your Website: Display it proudly on your sales page.
  • Amazon Kindle: Self-publish with confidence.
  • Social Media: Instagram, Facebook, and LinkedIn love eye-catching content.
  • Email Marketing: Entice subscribers with a professional-looking freebie.
  • Course Platforms: Give your online course a polished presence.

FAQs

Is The Graphics Creator beginner-friendly?

Yes! If you can click a mouse, you can create stunning ebook covers—no degrees required.

What if I want to make a 3D ebook cover?

No problem! The tool lets you map your design onto a 3D mockup—perfect for product displays.

Do I need additional software?

Nope! Unlike other design tools, The Graphics Creator does it all in one place.

Can I customize my designs?

Absolutely! Change fonts, colors, images—whatever fits your brand.

Ready to Create Your Own eBook Cover Today?

Stop stressing over cover design and start creating! Get instant access to The Graphics Creator and bring your ebook to life.

Your future readers (and your wallet) will thank you.

How to make a Facebook AND YouTube Graphic in under two minutes

0

Hi Creatorpreneurs!

Lisa and I were creating a new Facebook graphic (for the latest Facebook layout) the other day. And while we were at it, I had a lightbulb moment 💡—this would make a fantastic tutorial for you!

In this guide, I’ll walk you through how to create TWO incredible images—one for Facebook and one for YouTube—in under two minutes using The Graphics Creator software. You’ll look like a pro designer faster than you can say, “Where’s my coffee?” ☕

Why You Need Eye-Catching Facebook & YouTube Graphics

Let’s face it—nobody clicks on boring, poorly designed images. Social media today is a visual battlefield, and your graphics need to grab attention before your audience scrolls on by to a meme about cats or a conspiracy theory thread.

Here’s why top-notch Facebook and YouTube graphics are crucial:

  • More Engagement: Posts with stunning visuals get way more likes, shares, and comments. People love pretty things.
  • Higher Click-Through Rates: On YouTube, an eye-catching thumbnail can make the difference between views and… crickets. 🦗
  • A Professional Brand Image: Poorly designed graphics scream “I made this in Microsoft Paint in 2007″—don’t do that.
  • Increased Followers: If your content looks good, people assume your brand or channel is valuable. And guess what? They hit that ‘Follow’ or ‘Subscribe’ button.

So, let’s get to the good stuff—creating these graphics effortlessly.

How to Make a Facebook and YouTube Graphic in Under Two Minutes

Step 1: Fire Up The Graphics Creator

First things first, open The Graphics Creator. If you don’t have it yet, what are you waiting for? It’s only the easiest way to create jaw-dropping designs without needing a design degree or a 12-hour Photoshop tutorial.

Step 2: Choose a Template or Start from Scratch

You can pick from tons of pre-designed Facebook and YouTube templates. Templates are life savers! Just swap out fonts, backgrounds, or text to fit your brand.

  • For a Facebook Graphic: Look for a template designed for the current Facebook layout.
  • For a YouTube Thumbnail: Pick a template with bold, attention-grabbing visuals. You need that thumbnail to scream “Click me now!”

Feeling adventurous? Start from a blank canvas and let your creativity run wild! 🎨

Step 3: Customize Your Text & Fonts

Now, let’s add some personality. Adjust the text to match your brand or message.

  • Use big, bold fonts: People need to read your text at a glance.
  • Keep it short and sweet: No novels here—aim for 3-5 words max.
  • Make it fun: If your brand allows, add some humor or a quirky tagline.

Step 4: Add Graphics & Images

This is where the magic happens! Drag and drop cool images, logos, or icons to bring your design to life.

  • For Facebook: Use attention-grabbing visuals, but don’t clutter the image.
  • For YouTube Thumbnails: Use high-contrast colors and expressive imagery (bonus points if you put a shocked face in there!).

Step 5: Download and Upload Your Masterpieces!

Once everything looks amazing, save your designs. Then, head over to Facebook and YouTube and upload them like the digital Picasso you are.

Why The Graphics Creator is the Best Alternative to Photoshop & Canva Pro

Listen, I respect Photoshop and Canva Pro. But let’s be real—not everyone has the time or patience to navigate layers upon layers of confusing menus just to make a simple graphic.

  • Super easy to use: No fancy design degrees needed.
  • No monthly fees: A one-time price saves you tons over time.
  • Built-in templates: Skip the blank canvas panic attack.
  • Perfect for Creatorpreneurs: Quickly make graphics without wasting hours.

Join the Creatorpreneurs Academy for Even More Marketing Goodies

Guess what? When you grab The Graphics Creator, you also get access to the ‘Creatorpreneurs Academy’—a treasure trove of smart money tactics and creative marketing strategies delivered straight to you every week! 🙌

Frequently Asked Questions

How beginner-friendly is The Graphics Creator?

Oh, it’s so easy it should come with a warning: “Could cause sudden bursts of confidence in non-designers.” Seriously, you’ll be creating pro-level graphics in minutes.

Can I use it for other social media platforms?

Absolutely! Facebook and YouTube are just the beginning. You can create Instagram posts, Twitter headers, Pinterest graphics, and anything else your marketing brain dreams up.

What if I hate designing?

Great news! You don’t need to be a designer to use it. Stick to the ready-made templates and let them do the heavy lifting. Just personalize the text and colors, and you’re done.

Final Thoughts: Get Ready to Stand Out!

Creating stunning Facebook and YouTube graphics doesn’t have to be painful. With The Graphics Creator, you get pro-level results without the learning curve. So go ahead—give your content the glow-up it deserves. 🙌

Try it out, have fun, and get ready to see some serious engagement roll in. And if all else fails, slap a cat meme on there—works every time. 😆

The Best Software for Creating Your Own Desktop Wallpaper

0

The Best Software for Creating Your Own Desktop Wallpaper

Ever looked at your desktop wallpaper and thought, “Well, this is uninspiring”? What if I told you that creating a stunning, custom wallpaper is easier than making a cup of coffee? And let’s be honest, sometimes even that feels like a challenge before caffeine kicks in.

In this video, I’ll show you how easy it is to create your own desktop wallpaper using The Graphics Creator.

… even if you’ve never designed anything before.