Home Blog Page 20

HOW TO CREATE MOTION GRAPHICS

0

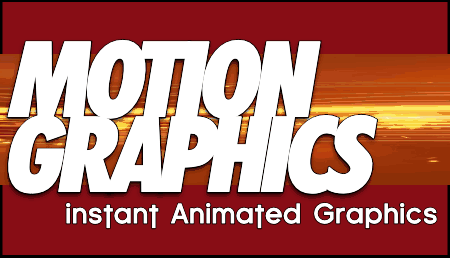
Want to learn how to create motion graphics that look like a professional animator made them—even if your only prior animation experience is making stick figures dance in the margins of your notebook? You’re in the right place! In this tutorial, I’ll walk you through how to create motion backgrounds with The Graphics Creator by Laughingbird Software. No complicated software, no stress—just fun, creativity, and really cool animated designs.

Why Create Motion Graphics?

Motion graphics are a game-changer for social media posts, marketing videos, website headers, and more. They add a professional touch to anything you create and instantly boost engagement. Because, let’s face it, plain old static images are so last season. If you want to catch people’s attention, you need a little movement—without jumping through complicated hoops to animate your designs.

What You’ll Need to Get Started

The best part? You don’t need expensive software or a degree in animation. You just need:

  • The Graphics Creator (Mac & Windows) – The ultimate design software that makes creating motion graphics super easy. Check it out here!
  • PEXELS integrated videos – Built right into The Graphics Creator, these free stock videos help you create stunning motion backgrounds in minutes.
  • The Cinemagraph Package – A collection of mesmerising animations from Bryan Mullennix of CrackerClips.
  • Handbrake (free tool) – A handy software that converts your video into a high-quality MP4 (because we all want our motion graphics to look crisp, not fuzzy). Download it here: https://www.handbrake.fr

Step-by-Step Guide: How to Create Motion Graphics

Ready to make some epic motion graphics? Follow these steps:

Step 1: Open The Graphics Creator

Launch The Graphics Creator and open a new project. If at any point you feel overwhelmed, take a deep breath, remember that this is supposed to be fun, and continue onwards.

Step 2: Choose a Motion Background from PEXELS

Thanks to the integration with PEXELS, you can easily browse high-quality video clips to use as motion backgrounds. Just drag and drop your selected video onto the canvas.

Step 3: Add Text and Graphics

Now, the fun part—customizing your design! Add text, shapes, and graphics. Play around with colors, fonts, and transparency levels. Remember, you’re the director here.

Step 4: Enhance with The Cinemagraph Package

To make your graphics even more eye-catching, use the Cinemagraph Package. These subtle, looping motion graphics will bring your design to life.

Step 5: Export and Optimize with Handbrake

Before you upload your masterpiece to Facebook or Instagram, run it through Handbrake for the best-quality compression. Here’s what I recommend for settings:

  • Format: MP4
  • Align A/V Start: Yes
  • Video Encoder: MPEG-4
  • Framerate (FPS): 30
  • Check “Constant Framerate”
  • Quality (Constant Quality): 1

Pro Tip: Don’t forget to save your preset—trust me, you’ll thank yourself later.

Why Use The Graphics Creator for Motion Graphics?

Sure, you could spend a small fortune on fancy animation software, but why overcomplicate things? The Graphics Creator is:

  • Easy to use – No steep learning curve.
  • Affordable – No need to sell a kidney to afford fancy animation tools.
  • Perfect for content creators – Whether you’re making ads, YouTube videos, or social media posts.

And if that isn’t enough to convince you, Laughingbird Software gives you access to their Creatorpreneurs Academy, where you can learn smart money tactics and creative marketing strategies every week!

FAQs

Can I use The Graphics Creator even if I have no design experience?

Yep! If you can drag, drop, and click a button, you can create motion graphics with this software. No prior experience is needed.

How do I make my motion graphics loop smoothly?

The trick is in the PEXELS videos and the Cinemagraphs package—they’re designed to loop naturally so your motion graphics play seamlessly.

Is The Graphics Creator better than Photoshop or Canva Pro?

If you love simplicity and want to create cool designs fast, then YES. It’s an amazing alternative to Photoshop and Canva, minus the overwhelming tools and layers.

Where can I get The Graphics Creator?

Head over to Laughingbird Software and grab your copy!

Now it’s your turn! Try creating your own motion backgrounds and let me know in the comments below—did you nail it or do we need to schedule a Photoshop intervention?

10 Graphics You Need for Your Online Business to Increase Sales

0

They say a picture is worth a thousand words, but in the world of online business, a great graphic is worth a thousand sales. Okay, maybe not exactly a thousand, but you get the idea. Your website could have the best copy ever written—so compelling it would make Shakespeare jealous—but if your visuals are dull, visitors will bounce faster than a cat avoiding a bath.

To keep people engaged (and spending), you need eye-catching, professional graphics that communicate your brand, showcase your products, and guide customers through their buying journey. Below, I’m sharing the ultimate checklist of the 10 graphics you need for your online business to increase sales—because let’s face it, looking good matters.

10 Graphics You Need for Your Online Business to Increase Sales

1. Page Header: The First Impression

The page header is like the welcome mat of your website. If someone knocks on your digital door and you’ve got nothing but a blank page or (even worse) a confusing mess, they’re likely clicking away faster than you can say “Wait, come back!”

A great page header needs:

  • Your logo and business name (branding, baby!)
  • A clear, compelling call-to-action (Subscribe, Buy Now, Learn More, etc.)
  • Easy-to-spot navigation links to essential pages (products/services, blog, contact page)

2. Product and Cover Images: Show, Don’t Tell

People don’t want to guess what they’re buying; they want to see it. High-quality product and cover images are non-negotiable.

Tips for effective product images:

  • Use high-resolution graphics—blurry images scream “sketchy website.”
  • If you sell digital products, create simple virtual covers.
  • For physical products, photograph them in good lighting and from multiple angles.
  • Show the product in action—customers love seeing how something works in real life.
Book cover design

3. Mockup Designs: Make It Look Real

Mockups add that professional polish to your marketing. They let your customers visualize your products in the real world rather than in some mysterious digital void.

Mockups are great for:

  • Book covers (look like a bestseller before you even sell a copy).
  • Digital courses (make that PDF look like a $500 program).
  • Software and apps (screenshots inside computers, tablets, or smartphones).

Just grab mockup templates, pop in your graphics, and boom—instant professionalism.

Mockup design sample

4. Lead Magnet Graphic: Get Those Emails!

If you want leads (and who doesn’t?), a great lead magnet graphic is key. Your freebie should look enticing—nobody wants to download something that looks like it was made in MS Paint.

A stellar lead magnet graphic should:

  • Include a clear title (e.g., “10 Hacks to Boost Sales”)
  • Use bold, eye-catching colors
  • Reflect your branding
  • Be simple but professional
Lead magnet example

5. Sales Announcements: Hype It Up!

Running a killer sale? You better tell people! A great sales announcement graphic can mean the difference between “meh” and “take my money!”

Pro tips:

  • Use bold text with discounts clearly visible (e.g., “50% Off Today Only!”).
  • Use bright colors, but avoid clashing tones.
  • Keep the message short and snappy.
  • Experiment with countdown graphics for urgency.
Sales announcement graphic

FAQs

Why are good graphics so important for online business?

Because humans are visual creatures! Graphics boost engagement, increase conversions, and make your brand memorable.

Do I need fancy design skills to create these graphics?

Not at all! Tools like Laughingbird Software make it easy to create stunning graphics, even if your design skills are limited to drawing stick figures.

Can bad design hurt my sales?

Absolutely! Poor visuals can make your brand look unprofessional, untrustworthy, and, well… not worth spending money on.

Final Thoughts

Running an online business without solid graphics is like trying to sell a car without a paint job—it just doesn’t inspire confidence. From website headers to product images and sales announcements, quality visuals are a must. And if designing graphics sounds overwhelming, don’t worry—tools like The Graphics Creator make the process ridiculously easy.

So, go on, level up your graphics, and watch those sales roll in!

Using “Layers” with The Graphics Creator

0

Welcome to another exciting **Tutorial Tuesday**! 🚀 Today, I’m diving into an incredibly useful technique that will take your designs to a whole new level—**Using “Layers” with The Graphics Creator** by Laughingbird Software.

Ever felt like your graphics look a little…flat? Like they’re missing some **oomph**, some **WOW-factor**? Well, have no fear because layering is here! 🎨

Why Should You Use Layers in Your Graphics?

Imagine making a **sandwich**. You wouldn’t just slap down a piece of bread and call it lunch, right? You need layers—lettuce, tomato, cheese, grilled onions (if you’re fancy), and maybe extra sauce. Well, your graphics work the same way! Layers **add depth, dimension, and visual interest** to your designs.

Here’s why layering is a *must-use* design technique:

  • **Creates a professional look** – No more amateur, one-dimensional designs.
  • **Allows for easy edits** – Change only one element without messing up the whole thing.
  • **Adds texture & contrast** – Helps text and graphics pop rather than blend in.
  • **Gives versatility** – Play around with transparency, shadows, and overlays.

What is “Layering” in The Graphics Creator?

Layering in The Graphics Creator is a simple but powerful technique where you **stack multiple elements**—like text, images, or shapes—on top of each other. Through strategic adjustments (such as color differences, transparency, or shadow effects), your designs can suddenly look **three-dimensional and visually stunning.**

How The Graphics Creator Makes Layering Easy

Unlike complicated software (looking at you, Photoshop 😏), **The Graphics Creator** simplifies layering so even a non-techy person could do it **before their morning coffee kicks in.** Here’s how:

  • **Drag and drop** layers right into place.
  • **Easily duplicate elements** – No need to manually recreate them.
  • **Resize and reposition** without distorting quality.
  • **Modify individual layers** without affecting the others.
  • **Apply drop shadows, transparency, and gradients** with a glance!

Now, let’s get to the good stuff—how you can **use layering for mind-blowing graphics.**

Step-By-Step Guide: Creating a Layered Text Effect

Alright, folks, it’s time to **roll up our sleeves and create something amazing**! Follow these steps to build a cool layered text effect in The Graphics Creator:

Step 1: Add Your Text

First, type out your text. Pick something bold so the **layered effect really stands out**—short, catchy phrases work best. Think **BOOM!**, **SALE!**, or **Look at This!** (not just because I’m telling you to 😉).

Step 2: Duplicate the Text

Now, duplicating is where the magic begins. Copy the text **three or four times** and slightly adjust each duplicate by:

  • Changing the color (try different shades of the same hue).
  • Adjusting the opacity **for a see-through, ghosted effect**.
  • Offsetting each duplicate **slightly up or down** for an embossed or 3D effect.

Step 3: Add Shadows & Transparency

Want a realistic look? Play around with the **shadow settings**! A subtle, well-placed shadow turns your flat text into something that practically jumps off the screen.

Step 4: Arrange the Layers for Maximum Impact

Move layers in front or behind each other to get **the exact effect** you want. A great trick? Use **a bold, darker-colored back layer** slightly offset from the front layer for an automatic 3D look!

Step 5: Export & Show Off!

And just like that—you’ve got a **powerful, layered design that looks professionally made**. Go ahead, show it off! Post it on social media, add it to your website, or just admire your newfound skills.

More Ways to Use Layers in The Graphics Creator

  • **Create layered backgrounds** for **depth and realism.**
  • **Mix textures and overlays** for unique effects.
  • **Use see-through layers** for a modern web design feel.
  • **Experiment with glow effects** to make text pop.

Final Thoughts: Why Layering Will Change Your Design Game

Using “Layers” with The Graphics Creator **is a game changer** when it comes to making your graphics stand out. It’s **quick, easy, and doesn’t require a design degree** (or an artistic grandparent to pass down the talent 😅).

So go ahead—experiment, get creative, and turn those flat graphics into **eye-catching masterpieces**!

FAQ

Do I need design experience to use layering?

Nope! The Graphics Creator makes layering **super beginner-friendly.** No fancy programs, no complicated tools—just creativity and a willingness to experiment.

Do layers affect file size?

Minimal impact! Since you’re mostly working with text and shapes, **your files won’t balloon in size** like they would in heavy design programs.

Can I use layered designs for social media?

Absolutely! In fact, layering makes your posts **WAY more engaging**—so don’t be surprised if you gain more likes and shares. 😉

Looking forward to seeing what you create! **(Make sure to subscribe to my YouTube channel so you don’t miss any new videos.)**

5 Ways to Use a “Power Pack” of Graphic Design Templates to Sell Things

0

Your online business success depends on one major thing—sales. Whether you’re running a website, blog, or social media store, your ability to sell determines your growth. And here’s a little secret: eye-catching, professionally designed visuals are one of the best ways to pull in visitors and keep them engaged.

If you’re looking to boost traffic and increase sales, it’s time to start using graphic design templates. A quality set of design templates can be a game-changer, making it easier than ever to create professional graphics that grab attention. Let’s dive into 5 ways to use a “Power Pack” of graphic design templates to sell things and grow your business.

5 Ways to Use a “Power Pack” of Graphic Design Templates to Sell Things

1. Get More Traffic to Your Website

Let’s face it—people are visual creatures. If you’ve ever stopped scrolling just because an image caught your eye, you already know how powerful design can be. That’s exactly what you want customers to do: stop, click, and take action.

With a powerful pack of graphic templates, you can create stunning images for:

  • Social media posts that attract engagement
  • Blog banners that make your content stand out
  • Advertisements with compelling calls to action
  • Email marketing visuals to increase open rates

Imagine pulling in more visitors just because your designs are too irresistible to ignore. Whether it’s Facebook, Instagram, Pinterest, or Twitter, using bold and creative graphics will increase curiosity—and that means more clicks!

2. Become Your Own Graphic Designer (Even If You Have Zero Experience!)

Hiring a designer can be expensive, and waiting for revisions can slow you down. But what if you could create your own graphics in minutes?

With the right set of editable templates, you’ll be able to:

  • Customize designs yourself with an easy drag-and-drop format
  • Make graphics on demand—you’re no longer dependent on a designer
  • Create multiple versions for different platforms in seconds

For example, you create a Facebook post graphic. Now, with just a little tweaking, you can adjust it for Pinterest, Twitter, or Instagram, keeping a cohesive look across all platforms. No more waiting—just quick, professional-looking graphics.

That’s the beauty of using a “Power Pack” of graphic design templates—it saves time, money, and effort.

3. Make Your Audience Believe in Your Solution

You could have the best product in the world, but if your designs look amateurish, your audience won’t take you seriously. Professional visuals make your business look polished and trustworthy.

Here’s a trick: Use people images in your designs. Research shows that images featuring real people increase engagement and trust. When potential customers see themselves reflected in your graphics, they connect emotionally with your offer.

With high-quality templates, you can easily swap out images and upgrade your designs in no time. Try inserting people images into your visuals and watch the difference it makes.

4. Outshine Your Competitors Without Spending Thousands

Big companies have teams of designers and marketing experts—but you don’t need a massive budget to compete.

By using a design template power pack, you can:

  • Create professional designs that rival big brands
  • Use motion graphics to make your visuals stand out
  • Design animated GIFs to increase engagement

Motion Graphics templates are an incredible way to stay ahead of your competition. Video and moving visuals attract more attention than static images, so it’s time to start incorporating them into your strategy.

5. Save Tons of Money (And Invest in Growing Your Business!)

If you’ve ever hired a graphic designer, you know how expensive it can get. Instead of spending hundreds (or thousands) on graphic design, why not DIY with templates?

By saving money on design costs, you can put that budget into:

  • Paid advertising to get more reach
  • Hiring a virtual assistant to help with daily tasks
  • Investing in other business growth strategies

And let’s be real—spending less while still looking professional is a win-win.

Get a Power Pack of Graphic Design Templates

We love design templates because they make things EASY. You don’t need fancy software or a degree in graphic design to create professional visuals. If you want a shortcut to amazing designs, check out the Power Pack of Design Templates from Laughingbird Software.

Watch This Video to See What’s Inside:

FAQs About Using Graphic Design Templates

Can I Really Design Graphics Without Experience?

Absolutely! These templates are made for non-designers. Just drag, drop, edit text, and you’re done. It’s way easier than trying to use Photoshop from scratch.

Will These Graphics Work for Any Industry?

Yes! Whether you’re selling digital products, running an Etsy shop, offering coaching, or promoting services, you’ll find graphics that fit your brand.

How Much Time Will It Actually Save Me?

A lot! Instead of spending hours (or days) trying to make DIY graphics from scratch, you’ll have templates ready to edit in minutes.

Final Thoughts: Start Designing Like a Pro

If you’re ready to uplevel your brand without breaking the bank, now’s the time to grab a set of templates and start creating eye-catching visuals. Check out the Power Pack of Design Templates today and watch your sales soar.

The Graphics Creator – A Cool “Green Screen” effect You Can Create (In Minutes)

0

Welcome to another Tutorial Tuesday! Hold onto your pixels because today, I’m going to show you an insanely cool “Green Screen” effect using The Graphics Creator. You’ll see how to magically erase parts of an image and create pro-level designs—in minutes. No wizard hat required!

The Graphics Creator: A Cool “Green Screen” Effect You Can Create (In Minutes)

Ever looked at an image and wished you could just zap away the background or certain elements? Maybe remove that awkward bystander photobombing your masterpiece? Well, you’re in luck! With The Graphics Creator, you can achieve a stunning “Green Screen” effect faster than you can say “Photoshop who?”—No fancy skills or overpriced software required.

What Makes The Graphics Creator a Game-Changer?

If you’ve ever dabbled in graphic design, you know that removing a background (or any part of an image) usually involves a tedious process of selecting, erasing, and possibly screaming in frustration. Not anymore. The Graphics Creator makes it:

  • Super easy: No design degree needed
  • Super fast: Get it done in minutes
  • Super fun: Yes, erasing things can be oddly satisfying

Whether you’re designing social media posts, business presentations, or that one meme your friends won’t stop talking about, the ability to remove backgrounds and tweak images effortlessly is a game-changer.

How to Create the Green Screen Effect (Even If You’re a Total Beginner)

Ready to see the magic? Let’s break it down into a few simple steps:

Step 1: Grab “The People Pack” Templates

Okay, first things first—get yourself some ready-made design templates! I’m using “The People Pack” template set because it includes professionally cut-out people images that you can customize to your heart’s desire.

You can get it here: https://stagingapril.laughingbirdsoftware.com/downloads/people-templates/

Step 2: Open Your Image in The Graphics Creator

Launch The Graphics Creator and upload your image. If you’re using The People Pack, you already have perfectly pre-cut images ready to go. If you’re working with your own image, don’t worry. The removal tool works just as effortlessly.

Step 3: “Erase” Unwanted Parts (It’s Like a Digital Magic Wand!)

This is where the magic happens. With just a few clicks, you can:

  • Remove backgrounds effortlessly
  • Zap away unwanted objects (bye-bye, random lamp post!)
  • Make transparent cutouts for cool overlay effects
  • Create custom graphics for thumbnails, social media posts, and more

No complicated learning curve, no stress—just easy drag, drop, and erase.

Why Use The Graphics Creator Instead of Photoshop?

Ah, Photoshop. The granddaddy of graphic design software. While it’s great, let’s be honest:

  • It’s expensive
  • It requires a PhD in patience
  • There are about 1,000+ buttons, and nobody knows what they all do

The Graphics Creator is the best alternative to Photoshop and Canva Pro. It strikes the perfect balance between powerful tools and user-friendly simplicity. You don’t need to watch hours of tutorials—you just open the software and start creating.

Perfect for Content Creators, Businesses, and Social Media Gurus

People all over the world trust The Graphics Creator for their content marketing and visual communication. Whether you’re a small business owner looking to make eye-catching ads or a social media guru needing an edge, this tool has you covered.

Bonus: Get Access to ‘Creatorpreneurs Academy’!

Here’s the cherry on top: Every Laughingbird Software product includes access to our ‘Creatorpreneurs Academy’. That’s right—you’ll get weekly lessons covering:

  • Smart money tactics
  • Creative marketing strategies
  • How to grow your online presence
  • Time-saving design hacks

Learning how to make money while creating amazing designs? Sounds like a win-win to me!

Final Thoughts: Should You Try The Graphics Creator?

If you’ve made it this far, you already know the answer. If you want fast, easy, and professional-looking graphics without the frustration of heavy software, then YES—The Graphics Creator is your new best friend.

Try it out today and see why thousands of content creators swear by it. And who knows? You might end up making designs so stunning that even Picasso would approve.

Check out more at Laughingbird Software and start creating magic with ease!

FAQs

Can I use The Graphics Creator on any device?

Yes! It works on both Mac and Windows computers. No fancy hardware required—just your creativity.

Is The Graphics Creator better than Canva?

While Canva is great, The Graphics Creator offers more customization and flexibility without the restrictions of pre-set layouts. Plus, you get one-time pricing instead of a monthly subscription.

Do I need a subscription to use it?

Nope! Unlike some design software that charge you endlessly, The Graphics Creator is a one-time purchase. No hidden fees.

Can I make logos and social media graphics with it?

Absolutely! The software is packed with tools for making logos, social media posts, banners, ads, and more.

Where can I learn more design tricks?

Join our Tutorial Tuesday series for awesome tips and tricks to level up your design game!

Now, go forth and create something amazing!

Simple SEO Tips for Images

0

If you’re a blogger, writer, or someone who just likes to overanalyze their cat’s Instagram captions, then you know how important search engine optimization (SEO) is. But while you’re sprinkling keywords like fairy dust in your text, you might be completely ignoring a crucial factor—your images!

And listen, I get it. The mere mention of SEO can make some people break out in a cold sweat. But today’s goal? To break down Simple SEO Tips for Images so that even your grandma’s quilting blog can start ranking in Google.

Why You Should Always Use Images in Your Article

Images do more than just make your article look pretty. Sure, a giant wall of text is about as inviting as a cactus hug, but visuals also help Google understand your content.

How to do a keyword search for images on Google

And here’s the kicker—Google is getting really good at understanding images! If you’ve ever searched on Google and hit the “Images” tab, you’ve seen how effective visual search is. So, if you don’t optimize your images correctly, you’re leaving a goldmine of potential clicks on the table.

How to Optimize Images for SEO

Now that you’re convinced (or at least mildly interested), let’s talk about how to actually optimize those images. Don’t worry—it’s not rocket science (unless your blog is literally about rocket science, in which case, carry on).

1. Choose the Best Image Size

Let’s play a game: what’s one of the biggest reasons websites load slower than a tortoise in a nap contest? Huge image files.

How to create an optimized image size using Canvas Format for your blog or article in The Graphics Creator.
Easily change the canvas size in The Graphics Creator to optimize your image size.

You need to use the smallest image size possible while keeping quality intact. How? Easy:

  • Create your graphics in a software like The Graphics Creator and set your canvas size before exporting.
  • Don’t upload an 1800 x 1200 image if you only need a 500 x 300 space—it’s overkill!
  • Check your page speed using Google’s PageSpeed Insights to see if your images are slowing things down.

2. Add Text to Your Image

Adding text to your images isn’t just for motivational quotes and memes—Google also picks up on text that is part of your images!

By adding relevant keywords and headings to your graphics, you help Google categorize your content correctly. Check out this quick video tutorial to see it in action.

3. Save Your Image With an SEO-Friendly File Name

If you export images with names like image12345.jpg, you’re basically telling Google, “Guess what this is, sucker.” Instead, use descriptive file names like simple-seo-tips-for-images.jpg to boost rankings.

4. Choose the Right Image Format

  • JPEG: Great for large images that need compression.
  • PNG: Best for high-quality images without major compression.
  • Transparent PNG: Use when you need a transparent background (otherwise, it’s overkill).

Best Practices for Placing Images in Your Articles

1. Use Captions When Necessary

People skim articles like they’re late for work, and captions naturally catch the eye. A well-thought-out caption can give readers vital context while sprinkling in extra keywords for SEO.

2. Alt Text: The Secret Weapon

Alt text (alternative text) is the holy grail of image SEO. It helps with:

  • Making images accessible to visually impaired users.
  • Showing up in Google Images (hello, extra traffic!).
  • Giving more context if images fail to load.

Example of good alt text: “Simple SEO tips for images – how to optimize image size and file names.” Bad alt text: “random pic”. Don’t be that person.

Final Thoughts on Optimizing Images for SEO

Optimizing images for SEO is like adding the final seasoning to a perfect dish—it makes everything better. Here’s a quick checklist:

  • Use at least 2-3 images per article.
  • Ensure images are the correct size and format.
  • Save with an SEO-friendly file name.
  • Add descriptive alt text.
  • Use captions whenever relevant.

And if you need an easy way to create professional-looking images, check out The Graphics Creator. You’ll thank me later.

Click on the image to get The Graphics Creator software and start optimizing your images.
Click here to get The Graphics Creator and start optimizing your images.

FAQs

How many images should I include in a blog post?

At least 2-3 images, depending on your content length. If your blog looks like a novel, throw in some extra visuals.

Do I really need alt text for every image?

Yes! It’s essential for accessibility and image SEO. Plus, Google loves it.

What image size is best for blog articles?

It varies, but 550 x 350 pixels is a good default. Resize accordingly to fit your blog layout.

Now go on, optimize those images, and let Google love you a little more!

Using The Graphics Creator WITH Other Design Tools

0

Using The Graphics Creator with other design tools is not just easy—it’s downright magical. 🎩✨ You’re about to discover some incredible ways to supercharge your design game, unlocking combos that’ll have you making jaw-dropping graphics faster than a cat knocks things off a table.

Why Use Other Design Tools with The Graphics Creator?

The Graphics Creator already gives you a powerhouse of design options, but what if I told you that you could take it even further? By using additional (and free!) online design tools, you can edit, customize, and enhance your graphics beyond what the software was originally designed to do.

Think of it like this: The Graphics Creator is the ultimate pizza base, and these extra tools are your toppings. You wouldn’t settle for just plain tomato sauce, would you? No! You’re adding pepperoni, extra cheese, and maybe even some pineapple (controversial, I know). So, let’s load up your graphics pizza with some must-have extras.

How to Get The Graphics Creator

Before we dive into the extras, if you don’t already have The Graphics Creator, you can grab it here: https://stagingapril.laughingbirdsoftware.com/

Alright, now that we’re all on the same page, let’s get to the fun part—hacking your graphics like a pro!

Using Photopea: The Free Photoshop Alternative

Ever dreamt of using Photoshop but didn’t want to sell your soul (or your coffee budget) for a subscription? Well, meet Photopea—a free online tool that works just like Photoshop. And yes, it’s totally legit.

Here’s how you can use it with The Graphics Creator:

  • Create your base design in The Graphics Creator.
  • Export it as a transparent PNG or high-quality JPG.
  • Open Photopea in your browser (www.photopea.com).
  • Upload your graphic.
  • Use Photopea’s advanced tools to add extra effects, tweak colors, or add layers.

It’s like giving your designs a special effects makeover. Think “before and after” of a home renovation show—but without the dramatic gasps.

Finding High-Quality Graphics with KindPNG

Ever feel like your designs need a little something extra? Maybe a cool clipart, a snazzy icon, or the perfect transparent image? Enter KindPNG, an online library of transparent PNG images that are ready to use.

  • Go to KindPNG and search for what you need.
  • Download a high-quality transparent PNG file.
  • Drag and drop it into The Graphics Creator.
  • Adjust, resize, and position to perfection.

This is especially useful if you need elements like badges, banners, or subtle design accents for social media graphics. (Or, you know, an oddly specific picture of a cat in sunglasses—because why not?)

The Graphics Creator: Your Ultimate Canva Alternative

If you’ve been using Canva or Photoshop and feel like you need an alternative without subscription headaches, The Graphics Creator is your dream come true. Here’s why:

  • No monthly fees—one-time buy = lifetime access to design magic.
  • Beginner-friendly—no steep learning curve (or confusing menus).
  • Fully customizable—drag, drop, resize, and boom! Instant masterpiece.
  • Perfect for social media—templates designed for professionals and marketers.

Plus, with The Graphics Creator, you gain access to the Creatorpreneurs Academy, where we dish out weekly tips on making money with your creativity. Think of it as your backstage pass to entrepreneurial success.

Combining Tools for Next-Level Results

When you combine The Graphics Creator with tools like Photopea and KindPNG, you gain unlimited creative possibilities. Let’s break down a few powerful combos:

  • Polish & refine: Use The Graphics Creator for layout and structure, then Photopea for extra effects.
  • Expand your asset library: Need extra elements? Grab them from KindPNG.
  • Batch creation: Create multiple designs quickly in The Graphics Creator, then tweak them in Photopea.

It’s like assembling a team of superheroes—except instead of fighting crime, they’re making you look like an absolute design genius.

FAQs

Is The Graphics Creator good for beginners?

100% yes! It’s designed so that anyone—regardless of experience—can create professional-looking graphics without pulling their hair out.

Is Photopea really free?

Yes! It’s absolutely free and functions almost exactly like Photoshop without requiring you to sell a kidney for a subscription.

Can I use KindPNG images for commercial projects?

Most PNGs are free to use, but always check the license details for each image to ensure there are no restrictions.

Why should I use The Graphics Creator over Canva?

Because you get a fully customizable design tool without subscription fees. Plus, it offers more unique templates that aren’t overused across social media.

And let’s be honest—who doesn’t want the flexibility to create awesome stuff without Canva’s “oops, that’s premium” surprises?

Final Thoughts

Using The Graphics Creator with other design tools is hands-down the best way to up your graphics game. Whether you’re designing for social media, marketing, or just for fun, this dynamic trifecta of The Graphics Creator, Photopea, and KindPNG gives you everything you need—all without breaking the bank.

So, go ahead—experiment, create, and stun the world with your newfound design superpowers. And hey, if you make something amazing, send it our way… we’d love to see it!

How to Write and Design Catchy Headlines That Make You Money

0

How to Write and Design Catchy Headlines That Make You Money

Ever feel like your headlines are about as exciting as watching paint dry? You’re not alone. A bad headline is like a closed sign on your storefront—people just keep walking. But the good news? A great headline can stop them in their tracks.

Think of your headline as the flashy neon sign for your content—whether it’s an ad, blog post, or email. Done right, it sparks curiosity, demands attention, and compels people to take action.

Stick with me, and I’ll show you the secrets to crafting killer headlines that make people click, read, and buy. Plus, I’ll dish out some simple graphic design hacks that’ll make your headlines pop. Ready? Let’s go.

Why a Catchy Headline Is Vital for More Clicks and Sales

Your headline is the first impression. And just like a weird first date, one bad move can mean game over.

According to Copyblogger, only two out of ten people will read past your headline. Ouch. That means eight out of ten are heading for the hills, never to be seen again.

But here’s the kicker—write a magnetic headline, and that number flips. More people stay, read, and engage. That means more leads, more sales, and (if you’re lucky) more adoring fans.

So how do you write a headline that stops the scroll and gets people interested?

Simple Rules for Writing Headlines That Grab Attention

Rules for writing catchy headlines

Before you start throwing words together, let’s nail down some golden rules:

  1. Make it Unique: The internet is flooded with headlines that look the same. Find a new angle. Try searching your title on Google in quotes—if it already exists, tweak it.
  2. Be Ultra-Specific: Vague headlines bore readers. Give specifics, like numbers or exact solutions.
  3. Create Urgency: If people think they can read it later, they never will. Urgency makes readers act now.
  4. Stay Useful: Will your audience get something valuable from this? If not, back to the drawing board.

Now that you’ve got the basics, let’s dive into the words that turn heads.

How to Write Headline Copy That Converts

Good headlines aren’t just flashy—they’re strategic. Here’s what you need to do:

  • Keep It Simple: No awards for the fanciest vocabulary. Clear over clever.
  • Speak Directly: Use “you” and “your” to make it personal.
  • Use Power Words: Words like free, easy, proven, and secret work like magic.
  • Trigger Emotion: A headline that makes people feel something will always win.

Headline Types That Drive Clicks and Engagement

Not sure what format to use? Steal one of these trusted headline formulas:

“How To” Headlines

How to Write Headlines That Get Clicked Every Time

How to Design Eye-Catching Ads That Sell

List Headlines

5 Headline Tricks That Will Skyrocket Your Clicks

10 Ways to Make Your Ads Stand Out in a Crowded Market

Shocking Headlines

You Won’t Believe How Simple This Headline Trick Is

Most People Get This Headline Formula Wrong—Do You?

How to Make Your Headlines Visually Irresistible

Words are powerful, but let’s be real—people are visual creatures too. A killer headline with poor design is like a movie trailer with no sound. Here’s how to level up your visual game:

  1. Size Matters: Make your headline BIG and bold!
  2. Color Counts: High contrast is your friend. Black text on a yellow background? That’s a winner.
  3. Give It Space: Cluttered text makes people’s eyes glaze over.
  4. Use Graphics: A well-designed graphical title can be a game-changer.

Need a Fast Way to Design Headlines?

Get pro-looking, attention-grabbing headlines in minutes with The Graphics Creator Text Effects Templates.

Get the Text Effects templates here!


FAQs About Writing and Designing Headlines

What’s the ideal headline length?

Keep it under 70 characters so it doesn’t get cut off in search results.

Should I use clickbait?

Nope. Overpromising and under-delivering just makes people mad.

Do headlines really make that much of a difference?

Absolutely. A better headline can increase click-through rates by over 50%.

Can I A/B test my headlines?

Yes! Run tests on ads, blog posts, or emails to see which headlines perform best.

Final Thoughts: More Clicks, More Sales, More Success

The secret to better engagement and higher conversions isn’t magic—it’s in your headlines. So, before you hit “publish,” ask yourself:

  • Is my headline unique and specific?
  • Does it create urgency?
  • Is it useful to my audience?
  • Does it have strong visual appeal?

Nail these basics, and you’re well on your way to grabbing more attention, getting more clicks, and making more sales.

Create Your Own Ads, Then HIRE a Social Media Manager To Promote them

0

In this video, I’m going to show you just how EASY it is to create your own ads and then hire a Social Media Manager (for way less money than you think!) to spread those ads all over the internet like digital confetti. 🎉

Follow Laughingbird Software on Pinterest

0

Want to level up your Pinterest game? Follow Laughingbird Software on Pinterest and get ready to ignite your creativity! Our carefully designed pins are here to inspire you, help you create eye-catching graphics, and grow your small business like never before.

Laughingbird Software's pins created for Pinterest

Why You Should Follow Laughingbird Software on Pinterest

Pinterest isn’t just about pretty pictures and drool-worthy recipes. It’s a goldmine for creative entrepreneurs looking to boost engagement, improve branding, and increase traffic. When you follow Laughingbird Software on Pinterest, you’ll get:

  • Eye-catching pin designs: Learn how to create attention-grabbing Pinterest graphics that get clicks.
  • Marketing & Business Growth Tips: Discover strategies to grow your online presence and increase sales.
  • Design Inspiration: Find fresh and innovative ideas to make your images stand out.
  • Motion Graphics Pins: See how animated visuals perform better than static images.
  • Step-by-Step Design Guides: Get easy-to-follow tutorials on leveling up your brand with visuals.

Boost Engagement by Pinning and Sharing

Did you know that sharing others’ pins can bring more engagement to your own Pinterest account? It’s true! When you follow Laughingbird Software on Pinterest, you can reshare high-quality pins packed with valuable content—bringing more attention to your board while helping others discover new design ideas.

Want a pro tip? Keep an eye on our motion graphics pins. These bad boys consistently get more views than static images. We’ve cracked the code on what makes an engaging pin, and spoiler alert—movement keeps eyes glued to the screen.

Create Scroll-Stopping Graphics with Motion Effects

There’s a reason why video and motion content dominate social media—our brains are wired to pay attention to movement. That’s where The Graphics Creator’s Motion Graphics templates come in.

  • Choose from pre-designed templates packed with eye-catching animations.
  • Resize graphics to a Pinterest-friendly 600 x 900 pixels.
  • Modify the image and text to match your brand.
  • Save and edit later for quick future designs.

Creating motion graphics might sound complicated, but trust us—it’s easier than trying to assemble IKEA furniture without instructions. You can create animated pins in just a few clicks.

Design templates that let you create motion backgrounds in your Pinterest pin images
Get the Motion Graphics templates with The Graphics Creator. Click the image.

How to Design a High-Converting Pinterest Pin

Want your pins to do more than just sit around looking pretty? If you’re designing Pinterest pins that don’t get clicks, don’t panic—we’ve got your back! Here are some foolproof ways to create high-converting pins:

  • Use Bold, Readable Fonts: Pinterest is a visual platform, so make sure your text stands out. Fancy script might look cute, but if no one can read it, what’s the point?
  • Incorporate Eye-Catching Colors: Bright colors get noticed, but make sure they match your brand.
  • Add a Call-To-Action (CTA): Tell people exactly what you want them to do—whether it’s “Click to learn more!” or “Follow for more tips!”
  • Test Different Designs: Sometimes, a small tweak in color or font can dramatically change engagement levels.
  • Make It Vertical: Pinterest LOVES vertical images. A 2:3 ratio (like 600 x 900 pixels) works best.

Remember, people scroll fast on Pinterest, so your design needs to pop! If you want pre-made templates that take out the guesswork, check out Laughingbird Software’s tools.

FAQs

Why should I use Pinterest for my business?

Pinterest isn’t just for party planning and home decor—it’s a powerful search engine that helps businesses connect with their audience. More than 450 million people use Pinterest every month to discover new ideas, products, and inspiration.

What makes motion graphics pins more effective?

Static pins are great, but movement is scientifically proven to capture more attention. Motion graphics keep people engaged longer, increasing the likelihood of clicks, saves, and shares.

How can I create a great Pinterest graphic if I have no design skills?

Easy peasy! Grab a template from Laughingbird Software, customize it with your text and images, and voila! No design degree required.

Final Thoughts – Let’s Pin Together!

By following Laughingbird Software on Pinterest, you’ll get a front-row seat to the latest design trends, social media hacks, and marketing strategies. Plus, you’ll have access to motion graphics pins that add extra life to your marketing.

So what are you waiting for? Click that follow button, grab a design template, and start creating pins that actually get engagement! See you on Pinterest!