Home Blog Page 11

The Complete Guide to Creating Graphics for Your Blog

0

The Complete Guide to Creating Graphics for Your Blog

Let’s talk about something on every blogger’s mind: aesthetics. Because, let’s face it—if your blog looks like it was created during the dial-up internet years, you’re probably not keeping readers around. A visually stunning blog isn’t just about the content; it’s about the vibe, and nothing screams “you’ve made it” like professional, captivating graphics. Ready to dive in and elevate your blog’s design game? Let’s start with the absolute essentials: backgrounds, headers, and post graphics.

Create the Perfect Background Image for Your Blog

Think of your blog like a showstopper outfit—the background is the outfit itself. It sets the stage, accentuates the accessories (a.k.a. content), and pretty much screams to the world, “I know what I’m doing!” So, how do you craft a visually appealing blog background that doesn’t look like a 90s PowerPoint slide? Spoiler alert: It’s easier than you think. Let’s get cracking!

Why a Jaw-Dropping Background Image Matters

Picture this: a visitor stumbles across your blog. Before they even read a single word, your background is already telling them a story—it’s the first impression whispering (or shouting?) what your blog is all about. Are you exuding confidence and professionalism, or are you accidentally giving off school project vibes?

With the right background image, you’re laying the foundation for your blog’s identity. It establishes trust, inspires engagement, and increases the chances people will stick around longer than it takes to close the tab. Believe me, a good background can even make your content Pinterest-worthy. And let’s be real—who doesn’t want to be Pinterest famous?

Tools to Create Background Images

You don’t need to remortgage your house to afford expensive design software. Here are my go-to, budget-friendly tools:

  • Canva: I cannot sing enough praises about Canva. Even if you were the kid who failed art class, Canva’s templates make designing downright addictive. Plus, you can create custom gradients that’ll make you feel like a bona fide artist.
  • Unsplash: An online treasure chest of free, high-quality photos. Need a dramatic shot of a mountain? A coffee cup on a rustic table? Unsplash is your new BFF.
  • Laughingbird Software: Talk about user-friendly! This tool takes all the guesswork out of creating graphics. It’s fast, fun, and perfect if you want that professional touch without actually being a professional.

Dos and Don’ts of Background Image Selection

Let’s discuss dos and don’ts before you get carried away with uploading a close-up of your cat to your header (not judging, but, y’know, let’s talk).

  • Do: Keep it clean and simple. A busy background is like wearing polka dots with stripes—it works for some, but most of us just end up looking confused.
  • Don’t: Use pixelated images. Unless your niche is “nostalgic bad-design irony,” low-res isn’t an aesthetic—it’s a nightmare.
  • Do: Choose images that fit your niche. Run a wellness blog? Try soothing colors and serene natural scenes. A tech blog? Slick, modern designs work wonders.
  • Don’t: Let the background overpower your content. You shouldn’t have to squint to make out your text—it’s a blog, not a Magic Eye puzzle.

How to Create an Attention-Grabbing Header Image

Next on the agenda: header images, often referred to as the unsung heroes of blog design. Think of them as your blog’s welcome mat. They’re there to catch the attention of your visitor, set the tone, and encourage them to stay for the full tour.

The Role of a Header Image

Imagine writing a blog post about the best pie recipes in the world, only to pair it with a blank, text-only intro. Yawn. Your header image should pull readers in, making them curious enough to click and keep reading. The goal is to create a visual representation of the content—something that shouts, “This post is worth your time!”

The Anatomy of a Killer Header Image

A good header image is like an expertly crafted cocktail—balanced, enticing, and full of personality. Here’s how to mix your own perfect graphic:

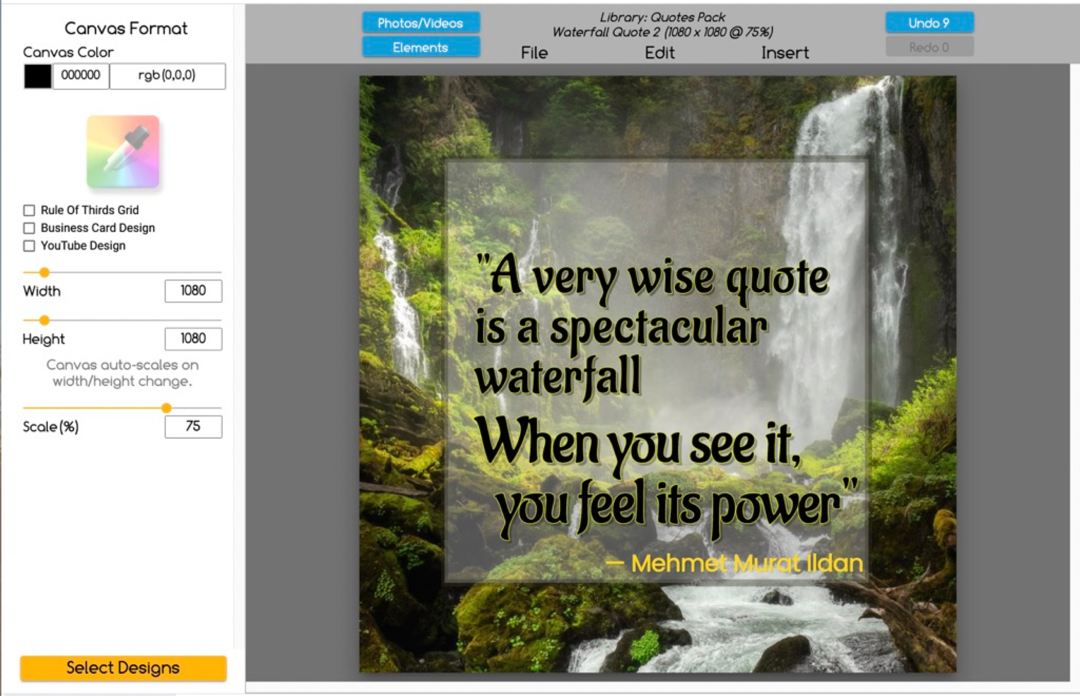
  • Step 1: Start with high-res images. No blurry nonsense, please. Whether you use your own photography or stock images, make sure they’re crisp and clear.
  • Step 2: Add text overlays. Can we all agree to leave Comic Sans in the past where it belongs? Playful blog? Try a fun, bubbly font. Writing on a serious topic? Sans-serif fonts are your classy go-to.
  • Step 3: Match your brand colors. Think of this as giving your header its identity. Consistency is key, so stick to your brand palette like glue.

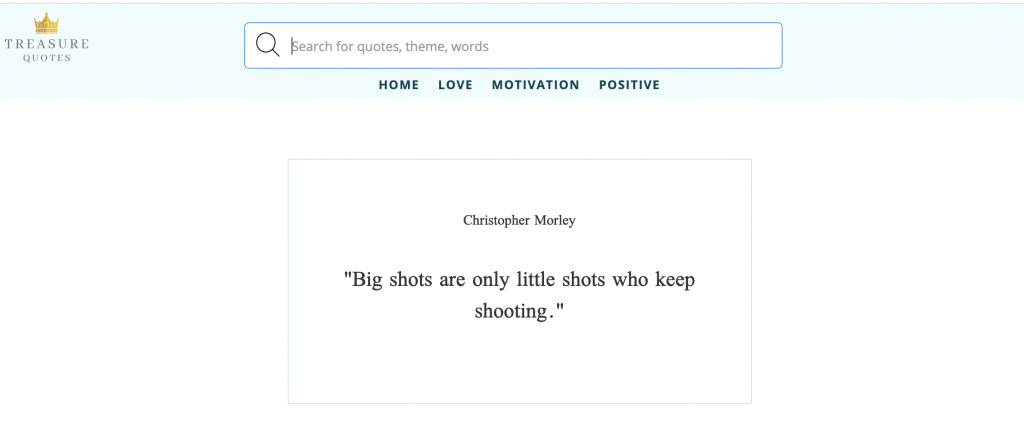
Bonus points if you incorporate quotes or memes that reflect your niche. Because let’s face it, memes are forever.

Tools to Make Header Image Creation a Breeze

If you’re not the DIY type, these tools will basically do all the heavy lifting for you:

  • Pinterest: Rediscover why this platform is a goldmine for design inspiration and templates.
  • Tumblr: Think artsy meets edgy. Great for gathering ideas and unique header references.
  • Dribbble: This one is like sneaking into a pro designer’s diary—get ideas, and sometimes, free templates!

Not feeling risky? Head over to Laughingbird Software to try their user-friendly graphic generator. Trust me; it’s a lifesaver.

How to Create Irresistible Post Graphics

You know your quirky illustrations or colorful infographics that readers fawn over? Those are called post graphics, and they’re the cherry on top of your content strategy. They don’t just make your posts pretty—they make them shareable and digestible. Imagine your blog post is a five-star meal; post graphics are the fancy garnish that ties everything together.

Why Post Graphics Are Critical

Let’s go behind the scenes for a second: search engines adore graphics. Data shows blog posts with visuals get more engagement, and that’s before we even talk about social media shares. A well-crafted infographic can do more for your blog post than a page of plain text ever could!

How to Nail Post Graphics Without a Design Degree

Worried you don’t have design chops? Relax—I’ve got you. Here’s a quick-start checklist:

  • Mix Fonts Wisely: Go for contrast, but draw the line at chaos. A bold title font next to a clean body font works wonders.
  • Stick to a Palette: Limit yourself to three core colors (max!) unless you’re hosting a kids’ birthday party on your blog.
  • Embrace White Space: Not every inch of your graphic has to be filled—negative space is the secret sauce of clean design.

If you’re feeling stuck, explore graphic tools like Laughingbird Software. They’re a one-stop shop for non-designers looking to DIY brilliant graphics.

FAQs: Blog Graphic Design

What size should my blog header images be?

Go with 1200×628 pixels—perfect for most blogs and social shares. Adjust as needed, but maintain quality.

How many visuals should I include in a blog post?

Too many can slow your site down. Aim for 2-3 good visuals that add value without hogging bandwidth.

What tools are best for bloggers just starting out?

Canva, Unsplash, and Laughingbird Software are must-haves. They’re easy to use and budget-friendly!

Do I need to credit photographers for images?

If they’re royalty-free, you’re mostly good, but it’s always nice to add a credit line when requested.

Why do my visuals look pixelated after uploading?

You may be resizing poorly or using low-res images. Always start with high-quality files and export correctly.

Conclusion: Mastering Blog Graphics

So, there you have it—your ultimate guide to creating stunning blog graphics. From professional-looking backgrounds to scroll-stopping headers and irresistible post graphics, you’ve got all the tools to dominate the blogosphere (or at least look like you are). And remember, it doesn’t take a tech-savvy design guru to make it happen—just a few user-friendly tools and some creativity.

Need a little help to get started? Visit Laughingbird Software. With their easy-to-use tools, you can finally stop stressing over design and get back to what you do best: writing and sharing your ideas. Now go forth and create something amazing!

Create Quotes – 10 tips on how you can come up with thought provoking quotes to use in your blog posts – backup

0

Quotes: Your Secret Sauce to Better Blog Posts

Quotes are like the premium seasoning for your blog posts—they wake readers up, add clarity, and sprinkle in some personality. Whether your goal is to inspire, entertain, or simply liven up your content, adding thought-provoking quotes can keep readers hooked and scrolling. But here’s the million-dollar question: how do you create quotes that make people pause and think? Buckle up because I’ve got 10 killer tips to help you create quotes so captivating they’ll shine brighter than my kitchen after a marathon cleaning session.

Remember this phrase: “Create Quotes.” Mastering this could level up your blogging game instantly!


Tip #1: The One Quote to Rule Them All

To kick things off, let’s channel a quote that’s as timeless as my fondness for cheesy rom-coms:

“People may forget what you said, people will forget what you did, but people will never forget how you made them feel.”

– Maya Angelou

This gem from Maya Angelou is practically a cheat code for quote creation. Why? Because emotions win over logic every single time. If your quote either grabs someone’s heartstrings or makes their brain whisper “interesting…,” you’re already winning.


Tip #2: Answer Your Reader’s Secret Questions

What are they REALLY wondering about?

Here’s the trick: picture your readers as curious cats (minus the nine lives). What questions might they have that align with your blog post’s theme? For instance:

  • Question: “What does success truly mean?”
  • Your Quote: “Success isn’t measured by the money in your pocket but by the moments that make your heart feel full.” — Yours Truly (or a fictional guru)

Turning FAQs into inspiring quotes gives your blog an irresistible flair, almost like you’re anticipating your readers’ innermost thoughts. (Insert a knowing wink here.)

Famous Quote Example
Brilliant quote? Pair it with a snazzy graphic! Credit: The Graphics Creator.

If you’re looking to make an impression, design visuals for your quotes to boost engagement. People love sharable content, and a sleek design takes it to the next level.


Tip #3: Draw Inspiration from Personal Lessons

Ah, life—it’s the gift that keeps on giving…or tripping you. But those stumbles? Quote gold. Use life’s antics to create meaningful nuggets. For example:

“I will never lose again because I’m too stubborn to give up.”

– John Cena

The real magic happens when you take relatable experiences (hello, Monday blues) and turn them into a slice of wisdom. Bonus points if it inspires someone to persevere—or at least double-tap your post on Instagram.

Heartwarming Bonus:

If you’re a hopeful romantic like me, throw in some love-centric wisdom:

“We come to love not by finding the perfect person, but by seeing an imperfect person perfectly.”

– Sam Keen

If your audience swoons, congrats—you’ve nailed it. Now let them have that honey-glazed moment of reflection before moving to the next tip.


Tip #4: Frame Questions as Quotes

Whoever said questions can’t be quotes was clearly missing out. Try crafting questions so compelling they linger in your audience’s minds. For example:

  • “What would you dare to accomplish if you believed failure wasn’t an option?”
  • “If I had nothing holding me back, what’s the first thing I’d do?”

Quotes framed as questions invite introspection—and maybe a social media comment or two. Mission accomplished!


Tip #5: Make ‘Em Laugh with Humor

Let’s be real: humor is the quickest way to earn attention. Quotes with irony, sarcasm, or pure silliness? Chef’s kiss.

“I’m so hungry I could eat an entire pizza…and dessert? Pfft, bring it.”

Funny quotes don’t just entertain—they create shareworthy moments. Bonus points if humor is your blog’s branding sweet spot.


Tip #6: Steal Inspiration from the Greats

If you’re fresh outta ideas, channel the words of history’s movers and shakers. Case in point:

“Luck is the residue of preparation.”

– Thomas Jefferson

Always, always credit your source correctly. Misattributed quotes… major cringe (and legally, a no-no).

Use tools for better quote designs
Tip: Tools like The Graphics Creator give quotes serious visual charm.

Tip #7: Infuse Your Personality

Quotes don’t have to sound like they belong in a philosopher’s journal. Dare to make them real, casual, and a reflection of *you.*

Friend: “I literally cannot even with today.”
Your Quote: “Sometimes ‘completely over it’ is just day zero of your comeback.”

Injecting positivity and self-made wisdom pulls readers in because they see a dose of authenticity in your quotes.

Use List Posts as Much as Possible – They’re Easy to Read & Tweet – backup

0

https://www.laughingbirdsoftware.com/downloads/youtube-channel-art-templates/

Welcome to The Creatorpreneur Tips Newsletter!

Every week, Marc and Lisa swing by your inbox to sprinkle a little digital sparkle on your entrepreneurial ambitions. Their mission? To deliver ridiculously simple tips that help you make extra cash, drive more traffic to your site, or (honestly, why not?) do both! Stuck asking yourself, “Why am I not making money online yet?!” Don’t stress. They’re here to make your life easier—and perhaps even sprinkle in a virtual high-five while they’re at it. Let’s dig in!


Why You Should Use List Posts as Much as Possible – They’re Easy to Read & Tweet

Okay, let’s have some real talk. As a content creator, I’ve noticed one undeniable fact: we’re all professional skimmers. Seriously, I skim everything from news articles to cereal boxes, depending on whether “frosted” is listed in the ingredients. Attention spans are plunging faster than my bank account during an Amazon sale. And that’s why list posts are absolute lifesavers.

Why are List Posts So Magnetic? (Hint: It’s a Goldfish Can’t-Look-Away Sort of Thing)

  • They’re Scannable: When readers skim—which they do 99.9% of the time—list posts make it easy to quickly find the juicy bits.
  • They’re Organized: Bullets, numbers, headings—it’s like the type-A sibling of online content. Everything in its proper place.
  • They Tease Curiosity: Admit it: you’ve clicked a “5 Ways to…” headline purely because you had to know what #4 was about.
  • They’re Made for Sharing: Visually snappy and to the point, list posts practically beg readers to hit share, tweet, or pin.

The magic lies in this simple truth: our brains crave structure. Nobody wants to wrestle with a dense slab of text trying to make sense of it all. Give them “7 Tricks to Organize Your Desk” and they’re drooling like it’s Thanksgiving dinner. But if you offer something vague like, “Thoughts on Desk Organization,” well… they’re already clicking away. Buh-bye, potential traffic.


How to Use List Posts as Much as Possible – They’re Easy to Read & Tweet

If you’re thinking, “Sure, list posts sound great, but writing one? Nope, not my thing!”—let me stop you there. Crafting a list post is less daunting than choosing a binge-worthy Netflix show. Let me break it down for you.

1. Choose a Buzz-Worthy Topic

Boring topics are a no-go. (Looking at you, “10 Tips for Proper Stapler Use.”) Focus on trends, solutions to common problems, or things people are already talking about. If you’re stuck, take a peek at what’s trending on Twitter or in industry-specific Facebook groups. Social media is a goldmine for ideas—you’re not creeping; you’re… strategically observing.

For example, instead of “5 Ways to Eat Cheap,” go for something more enticing like “5 Genius Hacks to Dine Like a King on a Pauper’s Budget.” See what I did there?

2. Break It Down, Chunk by Chunk

Nobody wants a messy list that feels like leftover spaghetti. Use headings, numbers, or bullet points to keep things structured and digestible. But don’t make the list so dry it reads like assembly instructions for furniture. Add a sprinkle of personality. Instead of stating a fact, guide readers through it as if you’re their favorite stand-up comedian moonlighting as their content guru.

3. Make It Useful—And Funny, If Possible

Nobody loves fluff. “Tip #5: Follow Your Passion!” Oh, boy. Revolutionary. Instead, offer practical advice combined with a dose of humor. Bonus? Readers are way more likely to share content that makes them laugh (or at least smirk into their coffee).

Let’s say you’re writing “8 Ways to Stop Overthinking.” Instead of dull filler, you could try something like:

  • Play a “What’s the Worst That Could Happen?” game. (Spoiler alert: it’s probably not that bad.)
  • Channel your inner Yoda: Feel the “meh,” you must.
  • Distract yourself by aggressively organizing your sock drawer. Productive procrastination FTW.

4. Call Them to Action

Never let people leave your post hanging. Did they love your list? Ask them to subscribe for more. Did they chuckle at your tips? Encourage them to share the post. Always end with a little nudge—it’s like dessert after a good meal. Satisfying and leaves them wanting more.


Use List Posts Strategically to Hit Your Traffic Goals

So, let’s talk strategy. You don’t want to crank out random lists willy-nilly and hope one gets traction. Nope. List posts can be your secret weapon for driving traffic, but they need to align with your goals.

How? Glad you asked! Here are a few killer angles:

  • Create lists that tackle problems your audience struggles with. Example: “5 Mistakes Beginners Make When Freelancing.”
  • Focus on megatrend topics. Example: “Top 7 AI Tools That’ll Save Entrepreneurs Time and Sanity.” People love a good tech roundup!
  • Use educational hooks. Example: “10 Life-Changing Canva Hacks You Never Knew You Needed.” Who can resist a hack or two?

Remember, list posts can be versatile BFFs to bloggers, creators, and entrepreneurs. Want someone to subscribe? Write a killer list. Need social media engagement? Post your list highlights as a tweet. The possibilities? Basically endless.

If you’re serious about optimizing your content workflow, check out Laughingbird Software. It’s like the Swiss Army knife of content creation—one tool to rule them all!


FAQs About “Use List Posts as Much As Possible – They’re Easy to Read & Tweet”

What’s the right number of points for a list?
Odd numbers are strangely more appealing to readers. “Top 5” and “7 Hacks” feel punchier than a plain “10.”

Do list posts only work for blogs?
Nope! You can adapt them for social media captions, newsletter layouts, YouTube scripts—anywhere you want to grab attention.

Should I always include humor in my list posts?
Yes, if it fits your tone. Just keep it light and relatable—nobody wants a joke that feels more awkward than a bad first date.

Can serious niches use list posts?
Absolutely. Even if your topic is on the serious side, a list like “5 Myths About Health Insurance” or “7 Dangerous Mistakes to Avoid in Financial Planning” can still work wonders.


Want More Tips? Watch This Video

Still feeling a bit unsure? No stress—watch this free tutorial on how to craft a killer list post: https://youtu.be/uxnuh_rzdFw. It’s like having your own list-post-building coach in video form!

Remember, every successful creator started somewhere. If Picasso could evolve from stick figures to masterpieces, why can’t you go from newbie to list post wizard? So, grab your idea notebook and get started. You’ve got this!

Using Dingbat fonts with The Logo Creator

0

Here’s the SEO-optimized article on Using Dingbat Fonts with The Logo Creator:

Unlocking the Power of Dingbat Fonts in The Logo Creator: A Comprehensive Guide

Hey there, design enthusiasts! Today, we’re diving deep into one of the most underrated yet incredibly powerful design tools in your creative arsenal – dingbat fonts. If you’ve ever wondered how to transform ordinary typography into eye-catching graphics, you’re in the right place.

What Exactly Are Dingbat Fonts?

Let’s break it down simply. Dingbat fonts are not your typical text fonts. They’re graphic-based typefaces that replace traditional letters with images, icons, and symbols. Imagine typing a character and getting a dog, a car, or a complex shape instead of a letter. That’s the magic of dingbat fonts!

Why Dingbat Fonts Matter in Design

• Unique Visual Communication
• Instant Graphic Elements
• Cost-Effective Design Solution
• Versatility Across Projects

Mastering Dingbat Fonts in The Logo Creator

When it comes to design flexibility, The Logo Creator is your ultimate companion. Here’s how you can leverage dingbat fonts to elevate your design game:

Step-by-Step Dingbat Font Integration

1. Open The Logo Creator
2. Navigate to Font Selection
3. Browse Dingbat Font Library
4. Select Your Desired Graphic Font
5. Experiment and Create!

Creative Applications of Dingbat Fonts

Logo Design Innovations

Dingbat fonts can transform a basic logo into a storytelling masterpiece. Want a coffee shop logo? Use a coffee cup dingbat. Running a pet service? Animal-themed dingbats are your best friend.

Branding and Marketing Materials

• Business Cards
• Promotional Flyers
• Social Media Graphics
• Presentation Decks

Pro Tips for Dingbat Font Mastery

• **Explore Diverse Font Collections**: Don’t limit yourself to one style
• **Experiment with Color and Size**: Dingbats look different at various scales
• **Combine Multiple Dingbat Fonts**: Create unique compositions
• **Consider Brand Consistency**: Choose fonts that align with your visual identity

Technical Insights: Understanding Dingbat Font Mechanics

Each dingbat character corresponds to a specific keyboard key. The Dingbat Font Key becomes your treasure map, helping you navigate this exciting typographic landscape.

Potential Challenges and Solutions

Common Dingbat Font Pitfalls

• **Font Compatibility**: Not all design software supports dingbat fonts
• **Limited Character Sets**: Some fonts have restricted graphic options
• **Readability Concerns**: Overusing dingbats can confuse your message

Pro Troubleshooting Strategies

1. Always have a backup standard font
2. Test designs across multiple platforms
3. Maintain visual hierarchy in your compositions

FAQ: Your Dingbat Font Questions Answered

**Are dingbat fonts professional?**
Absolutely! When used strategically, dingbat fonts can add a sophisticated, unique touch to your designs.

**Can I use dingbat fonts commercially?**
Always check the specific font license. Many dingbat fonts are available for commercial use with proper attribution.

**How do I install dingbat fonts?**
Most design software, including The Logo Creator, have straightforward font installation processes.

Conclusion: Your Design, Your Rules

Dingbat fonts are more than just quirky characters – they’re a powerful design language waiting to be explored. With The Logo Creator, you have the perfect toolkit to bring these graphic fonts to life.

Remember, great design is about storytelling. Dingbat fonts are your secret weapon in creating visually compelling narratives that capture attention and communicate effectively.

Ready to transform your design approach? Dive into the world of dingbat fonts and watch your creativity soar!

How To Create An eBook Cover

0

Hi Everybody!

It’s been awhile since I’ve posted a “Tutorial Tuesday” video.  😀

Thought it was about time.

In today’s tutorial, I’m going to show you how I personally work with The Creator in real-time. And in just under 11 minutes… I’m going to re-create a comic book cover I found while browsing online.

Create a Buy Button with The Logo Creator

0

Hi everybody!

Here’s a video I created a while back. It hasn’t been seen much (since it’s one of my earlier “How To” vids)… so I wanted to bring this back into the light. It’s a good one. It’ll give you a few new ideas on creating different images for your website.

And we now have a cool buttons, banners, and badges elements set to check out.

How To Use Pinterest To Bring in More Traffic To Your Website

0

Did you know Pinterest isn’t just for recipes and DIY crafts? Oh no, my friends, it’s grown up. Pinterest is now the **4th largest search engine on the internet**. That’s right—Google, Facebook, Bing, and then… Pinterest. Who knew, right?

What Makes Pinterest So Powerful for Your Website?

If you thought Pinterest was just about pinning pictures of dreamy vacation spots or your future puppy (don’t deny it, we’ve all done it), think again. Pinterest is a **visual search engine**—and an incredibly mighty one at that. People use it to find inspiration, ideas, and, yes, products and services.

Now, here’s some trivia that’ll knock your socks off: Pinterest drives **33% more referral traffic to websites than Facebook**. That’s not my hyperactive coffee-fueled brain exaggerating—that’s a fact. Pinterest users are action-takers. They want what you’re offering if you know how to put it in front of them.

3 Reasons Why Pinterest Rocks for Driving Traffic

1. High-Quality Audience

Pinterest users aren’t the aimless scrollers you find on other platforms. These people are dreamers with plans! They’re saving ideas, planning projects, or making decisions. In fact, **98% of users report trying something they found on Pinterest**. Isn’t it nice to show up to an audience that’s already interested in your niche?

2. Long Content Lifespan

Unlike social media posts that vanish into the digital abyss after a day or two, Pinterest pins are marathon runners—they keep going! A viral pin can stay relevant for months, even years, driving ongoing traffic to your site instead of demanding constant maintenance.

3. SEO on Steroids

Pinterest LOVES keywords. You can strategically use SEO on Pinterest by sprinkling keywords throughout your pin descriptions, board titles, and even image file names. Think of it as Google… but with more colors (and less intimidating spreadsheets).

How to Use Pinterest to Bring in More Traffic to Your Website

Start with a Killer Pinterest Profile

Your Pinterest profile is like your digital handshake; make it firm and memorable. Here’s how:

  • Write a concise, keyword-rich bio. If you’re a cupcake bakery, don’t just say, “I bake stuff.” Say, “Delicious handmade cupcakes for every event!” Own your niche.
  • Use a professional logo or photo for your profile picture. This isn’t the dating app world—leave the bathroom selfies behind.
  • Organize your boards by topics your audience cares about **(Hint: use searchable keywords in the titles!).**

Create Scroll-Stopping Pinterest Pins

Alright, here’s where the magic happens—making Pinterest pins that practically hypnotize your audience. Don’t worry; you don’t need to be the Van Gogh of Canva. Trust me. I learned this the hard way! Here’s the secret formula:

  • **Vertical Images Win**: Pinterest recommends a 2:3 ratio, like 1000 pixels by 1500 pixels — because apparently, taller is better here.
  • **Eye-Catching Fonts and Colors**: Go bold, bright, and beautiful. Save the minimalist aesthetic for your living room. On Pinterest, it’s all about POP!
  • **Call-to-Actions Work Wonders**: Adding text like “Click to Learn More!” or “Save This Idea!” helps grab attention faster than that cat meme going viral.

Want to take the easy road? Use tools like Laughingbird Software’s Pinterest Design Templates. They make you look professional without breaking a sweat (or your keyboard).

Optimize Pinterest Pins for Search

Remember when we talked about Pinterest loving keywords? Let’s take that to heart. This is your cheat sheet for making your Pinterest pins search-friendly:

  • **Use Keywords in Pin Titles**: “10 Easy Cupcake Recipes for Beginners” beats “You’ll Never Guess This!” every single time.
  • **Write Descriptions with Flair**: Be descriptive but relatable. Hey, you’re talking to humans, not robots.
  • **Hashtags Are Still a Thing**: Use 3-5 relevant hashtags like #cupcakerecipes or #dessertideas.

Want more tips? Check out this helpful link: Optimizing Pinterest Search.

Engage, Don’t Ghost!

Don’t just pin and disappear like a magician at a kid’s birthday party. Pinterest rewards consistent pinning, so aim for **at least 10-15 pins per day** spread throughout. If that sounds like overkill (and you’re thinking, “Do I look like the Energizer Bunny?”), use scheduling tools like Tailwind to streamline the process.

Also, remember to interact. Repin content, leave thoughtful comments, and engage with others. If the Pinterest world feels like a party, don’t be the wallflower—get out there and mingle!

FAQs About Using Pinterest to Drive Traffic

How long does it take to see results on Pinterest?

Good things come to those who wait… and those who pin regularly. Most people see traction within 1-3 months, but consistent efforts bring steady growth. Don’t expect overnight fame; this isn’t TikTok.

Can Pinterest work for all kinds of websites?

Absolutely! Whether you’re selling handmade soap or a digital marketing course, Pinterest has users looking for your offerings. Just tailor your strategy to your niche.

What’s the best way to track Pinterest success?

Use Pinterest Analytics (available with Business accounts) to see what’s working and optimize from there. Numbers don’t lie unless you’re counting jellybeans in a jar for a prize.

Pinterest Isn’t Just a Platform. It’s a Game-Changer.

So, there you have it. Pinterest isn’t just a “nice-to-have” in your social media arsenal—it’s your secret weapon for bringing in more traffic. Watch this video for even more insider tips, and start creating your Pinterest magic.

Don’t forget to leave me a comment below if you found this helpful! (Seriously, I read those!) Or check out more awesome tools at Laughingbird Software. See you on Pinterest—now go make those killer pins!

5 Types of Visual Content Marketing for Great SEO

0

Images: Your Secret Weapon in Visual Content Marketing

Let’s start with something we all love—images. If a picture is worth a thousand words, then using visual content like photos, logos, buttons, banners, and infographics is the SEO equivalent of writing a bestseller. Why? Because images grab attention faster than my dog snatching a dropped cookie (true story). Plus, search engines love them! Attractive visuals keep visitors engaged, reduce bounce rates, and make your website *look* like you know what you’re doing—even if you’re winging it.

To optimize your images, channel your inner fairy godparent and do this:

  • Give each image a story-worthy name. No, not “IMG_48372.jpg.” Use keywords! For example, instead of “cakepic.jpg,” try “chocolate-birthday-cake-design.jpg.” Just don’t cram every keyword into one poor file name—it’s not an overstuffed burrito.
  • Don’t forget alt text. This is where you describe what the image is about. Not only does this make your website accessible, but it also makes search engines go, “Hey, they’ve got what people are looking for!”

So, heroes, march forth and sprinkle your website with visual gold. Just make sure your images are easy on the eyes and fast to load. No one likes waiting for a picture to show up—especially not Google.

The Blog Chronicles: Your Key to SEO Success

Not to sound like a cheerleader here (pom-poms included), but blogging is your MVP when it comes to visual content marketing. It’s a combo meal of increased traffic, authority building, and search engine brownie points. Plus, let’s be real—if I can write a blog, so can you. Writing doesn’t have to be war and peace. Think bite-sized, fun, and valuable pieces of content.

Here’s how keeping a blog can help:

  • It gives you a platform to use all those juicy keywords.
  • You can link to your website, helping guide visitors to explore more pages.
  • Blogs are shareable! Got a witty title or cool infographic? Watch your audience become your free promo team.

Pro Tip: If you’re stuck on what to write, start with your audience’s FAQs. Spoiler alert: We’re doing that right now. Or, better yet, tell a story. People love stories, especially ones that teach them something useful (and maybe make them laugh a little). Trust me, your blog is the gift that keeps on giving—as long as you don’t abandon it like that gym membership you pretended to use in January.

Lights, Camera, SEO: The Power of Video

When it comes to visual content marketing, video is like the Beyoncé of SEO: unmatched, magnetic, and downright powerful. Whether it’s an explainer video, a product review, or even a quirky behind-the-scenes clip, video content has the firepower to grab attention and keep visitors on your page longer—cue the applause from search engines.

Why video, you ask?

  • It’s dynamic and engaging. People might scroll past text, but a cleverly titled video? Oh, that plays.
  • It’s shareable—Twitter, LinkedIn, and even your Aunt Karen’s Facebook feed can amplify your reach.
  • It drives traffic back to your site, which is where the SEO magic happens.

If you’re nervous about creating your first video, remember—you don’t need a Spielberg-level production. Start small! Even your smartphone can deliver a quality video these days. As you get comfortable, you’ll figure out what works for your audience. Heck, borrow some tips from my favorite source of inspiration: YouTube. Just promise me one thing—no shaky camera work. Think “inspiring” rather than “seasick.”

Pinterest: The Visual Content Marketing Underdog

If you’re not yet on Pinterest, consider this your wake-up call. This platform isn’t just for finding DIY projects that you’ll never finish—it’s a visual marketing powerhouse. Pinterest lets you create boards (basically themed galleries) where you can showcase all sorts of visual content like images, graphics, and infographics. Trust me, it’s not just for bragging about your avocado toast recipe.

Here’s why Pinterest is so darn cool for driving SEO:

  • You can link every “pin” back to specific webpages, driving traffic to your site.
  • Pins stay relevant for a long time—unlike other social media posts that disappear faster than cookies at an office party.
  • Aesthetically pleasing boards can showcase your brand and grab the attention of new audiences.

Have a peek at the Pinterest account I’ve been building for Laughingbird Software. I’ve loaded it up with software graphics, tips for working from home, and even web design resources. It’s like a buffet of awesome content that leads back to Laughingbird’s website. Pinterest is the gift to SEO that keeps on giving.

Infographics: The ROI Hero You Didn’t Know You Needed

Infographics might just be my love language. They’re visually appealing, packed with concise info, and, most importantly, they’re shareable. People go absolutely bananas over good infographics on Pinterest, Facebook, and other platforms. Why? Because they make complicated information easy to digest—we’re talking bite-sized clarity served on a silver platter.

Infographics can help you with:

  • Catching eyeballs faster than a meme war on Twitter.
  • Generating backlinks (other websites LOVE sharing infographics!).
  • Encouraging social shares, which drives website traffic and SEO value.

Don’t get intimidated by the design process. With tools like Canva or even Laughingbird Software, creating infographics is easier than parallel parking an electric scooter. Start with your audience’s FAQs or the key takeaways from your blog posts—because, let’s be honest, who doesn’t love a good “top 5 tips” format on a snazzy graphic?

Feeling Overwhelmed? Start Small with Visual Content Ideas

If this all feels like a lot, I get it. Trust me, when I first dipped my toes into the vast ocean of visual content marketing, I was more lost than a tourist without Google Maps. But here’s my advice: START SMALL. Don’t dive into all five techniques at once—it’s not a buffet where you have to try every dish. Pick one.

  • Love writing? Start a blog about things your audience cares about, and then sprinkle it with fun visuals.
  • Obsessed with design? Create a few eye-catching infographics and pin them on Pinterest.
  • Feeling brave? Experiment with video to add a dynamic touch to your brand.

The key is consistency. It’s just like riding a bike—except with more search rankings and fewer scraped knees. If I can make Pinterest work for me and slowly transition into blogging, you’ve got this too. And remember: SEO is a marathon, not a sprint. Pace yourself, breathe, and enjoy the process!

FAQs About Visual Content Marketing for Great SEO

Does using visual content really boost SEO?
Absolutely! Search engines love engaging content, and visuals reduce bounce rates, increase time spent on your site, and encourage sharing—check, check, and triple check for improved SEO!

Do I need expensive tools to create visual content?
Nope! Free or budget-friendly tools like Canva, Laughingbird Software, and even smartphones can do the trick. Professional results without the professional price tag? Yes, please.

Is blogging still relevant for SEO in 2023?
For sure! Regular updates with optimized, value-packed blog posts can help your site rank higher and bring in more traffic.

How do I make infographics if I’m not a graphic designer?
No graphic degree is necessary! With ready-to-use tools and templates, even beginners can design professional-looking infographics. Start small and work your way up.

Hope you’ve enjoyed this visual content marketing ride! Keep checking back for more tips and tricks on SEO, marketing, and business strategies—delivered with a sprinkle of humor, of course.

5 SEO Web Design Tips

0

5 SEO Web Design Tips to Boost Your Online Presence in 2024

In today’s day and age, the ever-changing world of the internet isn’t for the faint of heart—or for those clinging to outdated strategies. Mastering web design for SEO? Oh, that’s not just a flashy skill, it’s your ticket to survival in an ever-competitive digital jungle. Let’s dive right in, shall we? Here are five SEO web design tips that could very well be your website’s glow-up moment.

1. Craft Compelling, Keyword-Optimized Content

Look, content is to your website what coffee is to a Monday morning—essential. But not just any content! We’re talking about content that winks at your audience and whispers, “I get you.” That’s the secret: Creating content tailored to your user’s pain points while strategically sprinkling the right keywords.

Key strategies to make your content shine:

  • Target Natural Language Keywords: People don’t search like they’re writing a grad school thesis. They type things like, “How do I make my website less boring?” instead of “website enhancement strategies.”
  • Use Keywords Authentically: If keyword stuffing were a party trick, it’d be the one that makes everyone cringe. Use your keywords where they make sense—titles, headers, and meta descriptions—but don’t sacrifice readability. No one’s clicking on a robotic word salad.
  • Solve Real Problems: Your content should be like the friend who shows up with pizza on moving day—unexpectedly helpful. Answer FAQs, provide solutions, and leave your readers nodding their heads going, “Finally, someone gets it!”

Pro Tip: Pretend your website copy is a casual coffee date. If you wouldn’t say something out loud during a chat, skip it. Your readers (and Google) will thank you.

2. Design an Intuitive, User-Friendly Website Navigation

Ever felt lost at a fancy self-serve salad bar with way too many options? That’s what bad website navigation feels like. Don’t let your visitors get stuck wandering—not every user has Google Maps-level patience.

Tips to create “chef’s kiss” navigation:

  • Clear, Descriptive Headers: Users shouldn’t play a guessing game when a header says, “Click Here,” or other vague nonsense. Say what the page is about!
  • Organized Menus: Keep it simple. No need for your navigation menu to be longer than a CVS receipt. Group related topics logically.
  • Clickable Images with a Purpose: Don’t just slap a pretty picture on your homepage. If it’s clickable, ensure it leads to a relevant page.
  • Functional Links Only: Clicking a broken link feels like walking into a room and forgetting why you’re there. Test, test, and test again!

3. Implement a Strategic Sitemap

Imagine your website as a sprawling metropolis, and your sitemap is the subway map that helps Google bots navigate all your digital boroughs. If you don’t have a proper sitemap, those bots are just wandering aimlessly like a tourist without a guidebook.

Sitemap best practices:

  • Use Free Online Tools: Programs like XML-Sitemaps Generator are lifesavers for whipping up an efficient sitemap in minutes.
  • Include All Critical Pages: Ensure that your product pages, blog posts, and “About Us” section make the cut—but skip orphaned or outdated pages.
  • Update Regularly: Just added a swanky new blog post? Tweak your sitemap! Consistency is a love language search engines understand.
  • Submit It to Google: Google Search Console is your BFF for making sure the Big G knows what’s cooking on your site. Don’t leave it guessing!

4. Prioritize Mobile Responsiveness

Mobile optimization isn’t “a trend” anymore—it’s non-negotiable, like paying your phone bill or keeping guacamole out of your keyboard. With most people now glued to their phones, your website should look fab on screens of all sizes.

What makes your site mobile-friendly? Let me count the ways:

  • Responsive Design: Your website should have the flexibility of yoga – stretching and adjusting seamlessly to fit a smartphone, tablet, or desktop screen.
  • Fast Loading Times: If your page loads slower than your grandma’s dial-up internet from 1998, no one’s waiting. Use tools like PageSpeed Insights to give your laggy site some TLC.
  • Legible Text: No one wants to pinch-and-zoom their way through massive walls of text. Keep your font size readable from the get-go.
  • Easy-Tap Navigation: Make those buttons big enough for clumsy thumbs—aka mine.
  • Compressed Images: Massive image files are your enemy here. Compress and optimize them without sacrificing quality for quicker load times.

5. Leverage High-Quality Visual Content

Repeat after me: “Visuals are not an accessory; they’re the outfit.” A picture (or infographic, or video) isn’t just worth a thousand words—it’s a secret weapon for keeping users engaged and amplifying your SEO game.

Tips for savvy visual content:

  • Use High-Res Images: Pixelated, blurry images are a one-way ticket to creating distrust. Invest in professional shots if you can.
  • Optimize File Sizes: The Mona Lisa would still be a masterpiece even if it were scaled correctly. Shrink image sizes without compromising the quality.
  • Include Descriptive Alt Text: Not only does this help with SEO, but it ensures your site is accessible to visually impaired users too. Plus, Google loves seeing you being inclusive.
  • Go Custom: Use unique visuals that align with your brand. Tools like Laughingbird Software make it easy to create custom graphics without draining your wallet.
  • Keep It On-Brand: Your visuals should match your vibe. A comic sans meme doesn’t belong on a luxury wedding planning site—unless it’s a really niche joke.

Bonus: Tools and Resources

When it comes to boosting your site’s SEO and design combo, these are non-negotiables in your toolbox:

FAQs About SEO Web Design

How often should I update my website’s content?
Ideally, you should aim to keep things fresh by adding or updating content weekly—or at least bi-weekly. Outdated content can age your site faster than expired milk.

What’s the ideal keyword density?
Keep it natural, like a conversation—about 1-2% of your total content. Just sprinkle it in like seasoning, not like you’ve upended the salt shaker.

How do I know if my website is mobile-friendly?
Google’s Mobile-Friendly Test Tool will give you all the deets. Spoiler alert: It’s more honest than your mirror on a bad hair day.

Internal Links:

Remember, good SEO isn’t about tricking Google. It’s about creating value for your users while giving search engines enough breadcrumbs to pick up what you’re putting down. Balance, my friend—it’s all about balance.

How To Build Social Media Love

0

How to Build Social Media Love: A Comprehensive Guide to Authentic Online Connections

Social media love—sounds romantic, doesn’t it? But let’s get real: it’s less about candlelit dinners and more about crafting meaningful connections with your audience. Social media isn’t just a megaphone for announcements; it’s a two-way street requiring engagement, authenticity, and a touch of charisma.

As someone who has navigated the chaotic world of likes, shares, and hashtags, I’ve picked up a few tricks along the way. Want to turn passive followers into raving fans? Buckle up, because we’re diving deep into everything from content creation to engagement strategies—all with a dash of humor.

Why Social Media Love Matters

Before we go full throttle into strategies, let’s set the stage. Why do you need social media love? Because let’s face it—competition is fierce. With millions of posts popping up every second, if you’re not standing out and fostering connections, you’re just shouting into the void.

  • It builds trust: Genuine engagement with followers makes your brand more reliable and relatable.
  • It boosts visibility: Social media algorithms favor brands that spark conversations.
  • It drives conversions: People buy from brands they know and trust, not faceless corporations screaming “BUY NOW!”

How to Build Social Media Love Through Meaningful Content Curation

Content curation isn’t just about sharing other people’s work—it’s about crafting a value-packed experience for your audience. But let’s be honest: mindless reposts with zero commentary won’t cut it.

The Art of Personalizing Shared Content

Think of curated content like a dinner party. You wouldn’t just serve frozen meals without adding a personal touch, would you? Apply that same idea to social media:

  • Add your take: Before hitting repost, add a caption explaining why the content matters.
  • Make it conversational: Ask your audience what they think.
  • Relate it to your brand: Tie it back to your mission or values.

For example, if you’re sharing an insightful industry article, don’t just plop down a link—say why it struck a chord with you. Something like, “This blew my mind! Here’s why I think it changes the game.”

How to Build Social Media Love Without Annoying Your Followers

Striking a Balance Between Promotion and Connection

Ever been at a party where someone only talks about themselves? Annoying, right? That’s exactly how it feels when a brand bombards followers with non-stop promotions.

The 80/20 rule is your best friend here: 80% value, 20% promotion. Keep your followers engaged with informative, entertaining, or inspiring content, and only sprinkle in a little self-promotion.

Creating Your Own Content: The Backbone of Social Media Love

So, you’ve shared great content from others. But how do you really stand out? By creating original posts tailored to your voice and brand. This is where the magic happens.

Content Creation Strategies That Work

  • Consistency is key: Whether it’s daily, weekly, or bi-weekly, stick to a schedule.
  • Tell stories: People love narratives—share behind-the-scenes, customer stories, or personal experiences.
  • Be visually appealing: Use images, graphics, and videos (bonus points if you create them with Laughingbird Software).
  • Make it relatable: Memes, humor, and pop culture references can go a long way.

The Golden Rule: Responsiveness

Imagine talking to someone, and they completely ignore you. You’d walk away, right? Well, that’s exactly how social media works. If someone comments or messages you, respond!

Engagement Best Practices

  • Reply within 24 hours: The faster, the better.
  • Be human: No robotic responses or generic “Thanks!” messages.
  • Show appreciation: A simple “Thanks for your insight!” goes a long way.
  • Turn comments into conversations: Ask follow-up questions.

Authenticity: The Secret Sauce of Social Media Love

If you take away one lesson today, let it be this: Be human. Nobody wants to engage with a faceless, soulless brand.

Adding Personality to Your Brand

Share life behind the scenes! Whether it’s an office blooper, your morning coffee obsession, or a team celebration, these little moments make you relatable.

Frequently Asked Questions: Social Media Love Edition

How often should I post to stay relevant?
Quality trumps quantity. Posting consistently—even just a few times a week—is better than overwhelming your audience with content.

Can small businesses compete with big brands?
Absolutely! In fact, smaller brands often have an advantage because they can build more personal, authentic relationships.

How do I know if my strategy is working?
Engagement levels (likes, comments, shares) tell you more than just follower count. If people interact with your content, you’re on the right track.

Final Thoughts: Your Journey to Social Media Love

Social media love isn’t about chasing followers—it’s about creating relationships. Whether through engaging content, prompt responses, or genuine interactions, the key is to be present, be real, and most importantly, have fun.

Remember: Every post is a handshake, not just a broadcast.

Want to up your content game? Visit YOURWEBSITE.com for even more resources and tools!